I wanted to take my new van on a shake-down and try out all it's systems. I also had another mission - to go visit a dealer for Ranger Tugs (www.rangertugs.com) and see if the boat they have in stock is something I'd like to buy.
Since my closest dealer is in Charleston, SC, that made my choice of destination easy! I'd camp a few days in the area, go look at a boat, and then get home in time for Thanksgiving.
It was a little chilly - in the 40's during the day, 30's at night. That was a good thing - I'd get to test out the Truma system for heat and water heating.
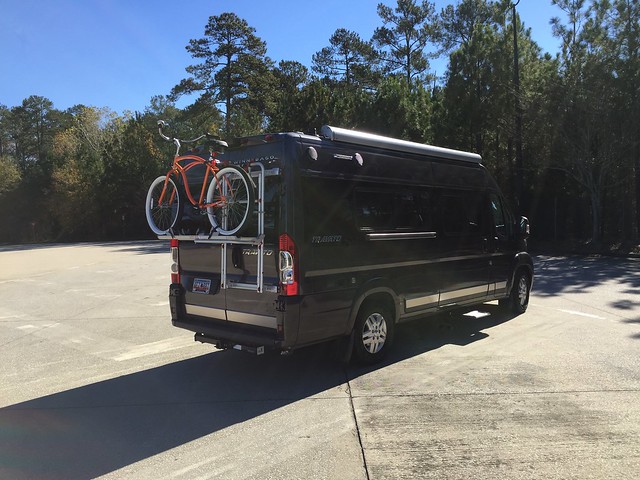
I also wanted to try out the new cruiser style Firmstrong bicycle I bought.
(Link to Firmstrong Bicycle on Amazon)
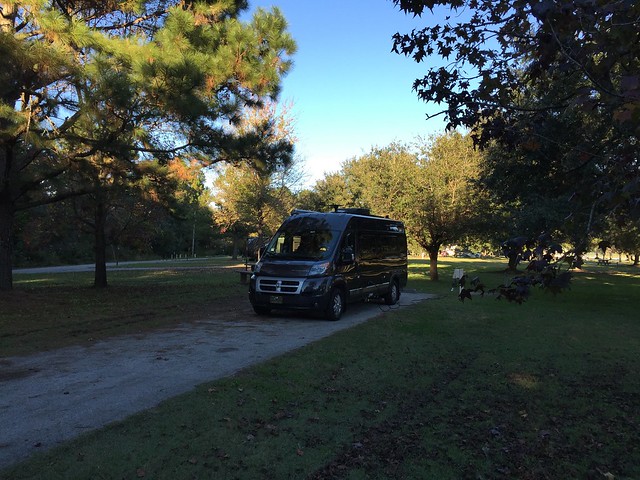
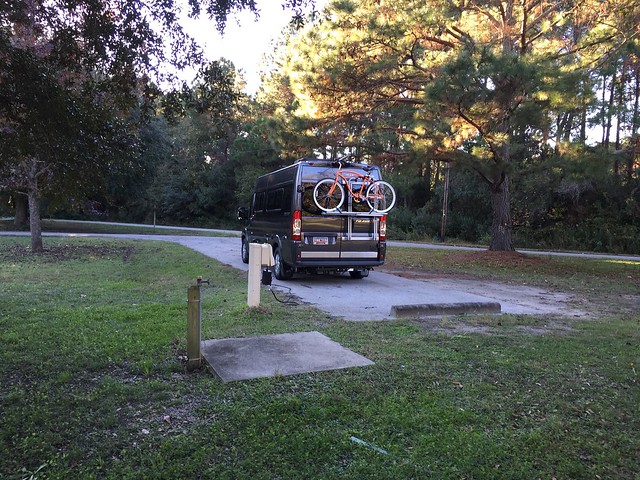
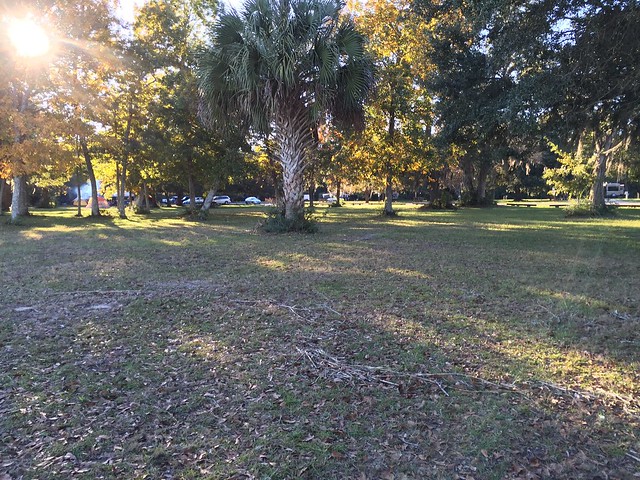
The camp I selected was Buck Hall Recreation Area. It's nothing fancy, but it was a quiet, small park on the Intercoastal Waterway near McClellanville (east of Charleston). It was a straight shot up the road from the Ranger Tug dealer, so the location was very convenient.
The park was a bit in disarray, being past the end of the season. Some people had torn up a good bit of the grassy areas - the ground was damp, so their tires easily sunk into the ground. I'm sure by spring, everything will once again look great. The spaces are nice and spacious, a bit big for a little Class B like mine.
I didn't use the shower house or any of the other facilities, so I can't comment on their state. I was there to use my own systems anyways! I did end up using the dump station when I left and the end of my visit. It was fine and not busy, but in a Class B, you really only need a couple of minutes to dump your tanks.
To sum it up, everything worked perfectly. The Truma has more than enough capacity to keep the van toasty. Having enough hot water for showers and dishes was not an issue at all. In fact you have to be very careful you don't burn yourself, as there are two settings on the Truma. I found if you are using the heater, you can set the water heater on the low setting and it's plenty hot enough.
I also ran off my water tank to test out the pump. For my 3 day trip, I had plenty of water from my 25 gallon tank. The 13 gallon gray tank was full though.
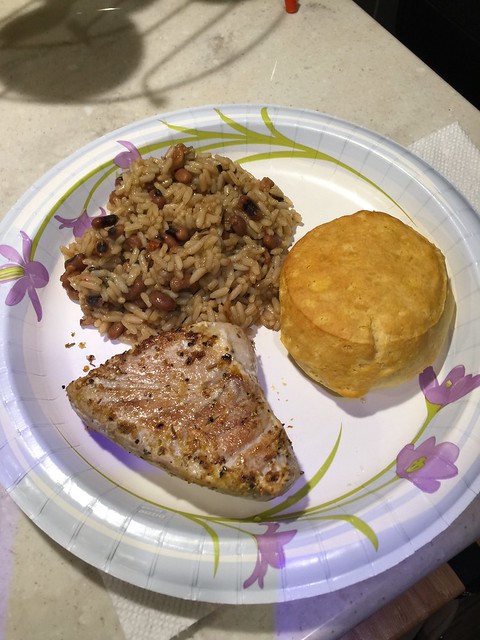
The convection oven is a god-send. It's nice to be able to make biscuits once again. So I made this nice dinner of tuna steak, red beans & rice and buscuits.
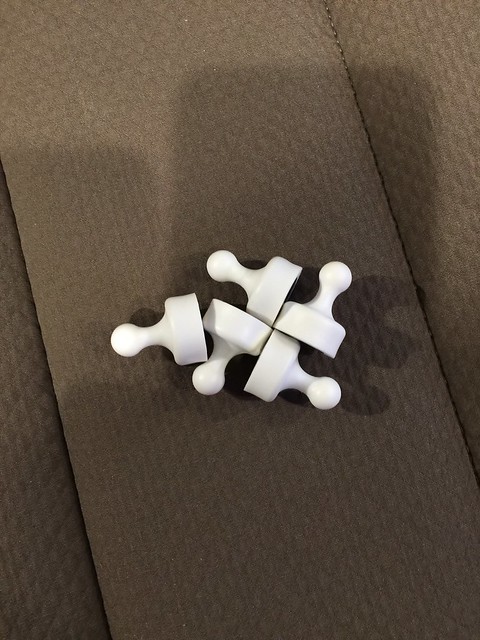
One thing that was a surprise was finding these what looks like chess pieces.
They are not mentioned in any manual and the dealer didn't mention them. What I discovered was that these are magnets used to hold the shower curtain in place against the rear doors so it doesn't cling to you while you are showering. Once in place, there is plenty of room to take a shower without anything touching you.
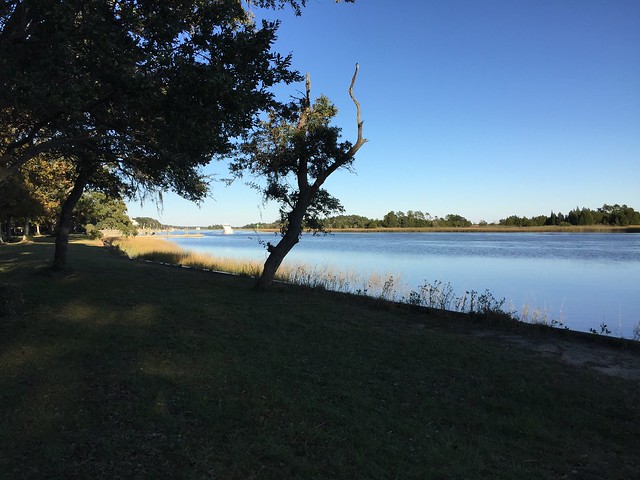
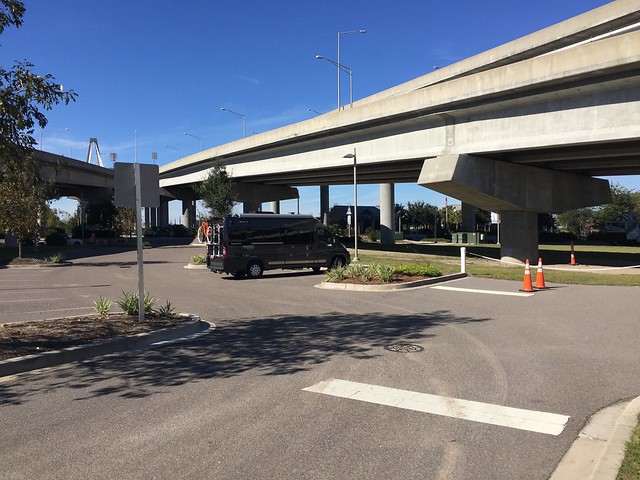
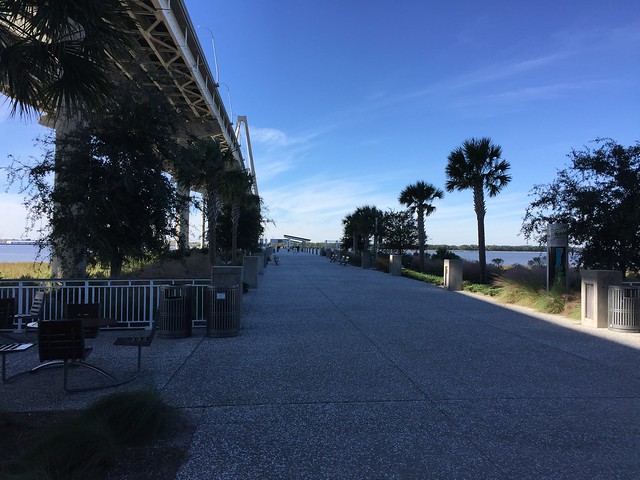
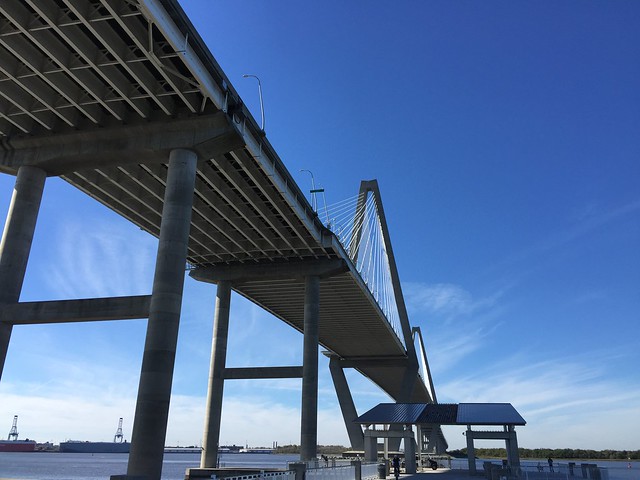
After my trip to the boat dealer, I decided to do alittle bit of sight seeing in Charleston. I stopped at the bridge to walk out on the pier. It's a nice little park almost underneath the bridge. Mount Pleasant Memorial Waterfront Park
Being that it was during the workday, there was hardly anyone there. Also, it's free!
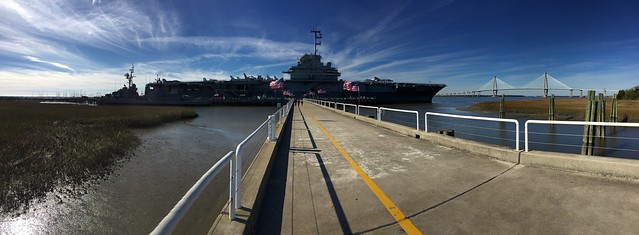
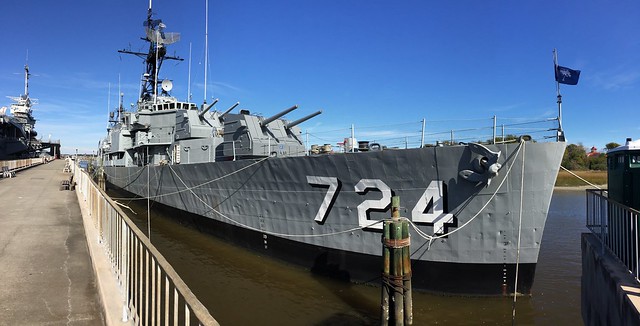
You can also see Patriot's Point Park from the pier, so that got my curiousity up, so after a quick lunch in the van, I headed down there to look at the USS Yorktown and the other items on display.
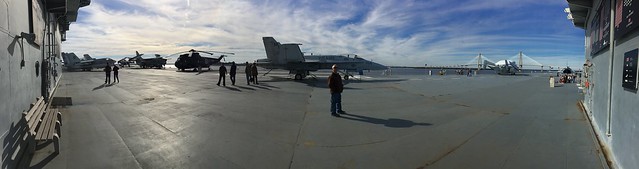
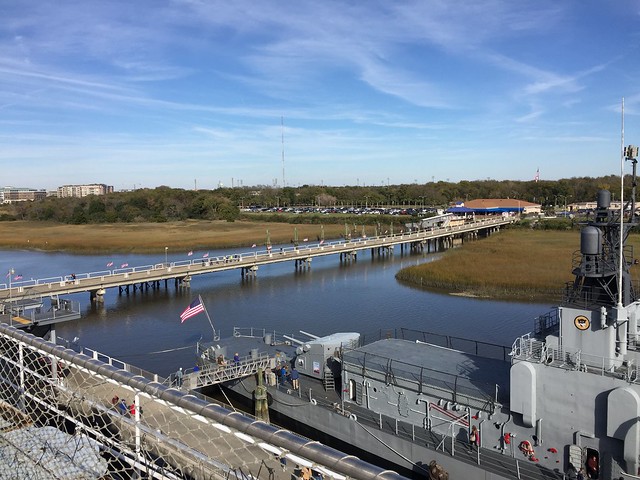
At Patriot's Point, I took hundreds of photos. Here is a link to my Flickr album if you want to look thru all of them. Below are a few choice panaramas I shot with my iPhone:
I thought the submarine was quite interesting, albeit it was in pretty rough condition. They are working on it, but they need the admissions revenue, donations and volunteers to make it happen. To visit the site and crawl all over these vessels, was $20. You can also get on a boat cruise to Fort Sumter (opening battle of the Civil War) for another $20. I didn't have time to go, so maybe on my next trip.
Of course with the B, you can park with everybody else, no special RV section. Can you see my sweet stealthy B? (Hint: far left, upper part of the lot).
I also thoroughly enjoyed crawling thru the bowels of the Yorktown. Even went down in engine room and I nerded out a bit. You could easily get lost down there. People must have been alot shorter then (in the 1940's) as I bumped my head more than a couple times!
All in all, it was a great trip. I also ended up ordering a Ranger Tug. More on that later - I should take delivery in late February.
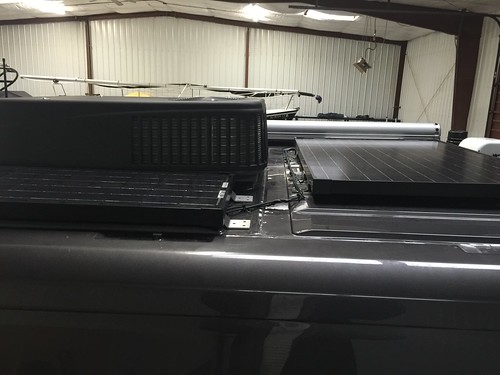
It took me 3 weeks, but such is life.  I installed two, 80 watts Zamp solar panels on my Travato 59k. I ordered the parts from Solardealz.com. All in around $500.I bolted the supporting brackets to the panels thru holes I drilled. I had to space the brackets so they would fit the grooves on the roof of the van. I stuck the brackets to the roof with 3M VHB tape (type 5952). I then coated the feet with black dicor. That stuff can be incredibly messy! WD-40 will take it off painted surfaces, glass, hands, arms, etc.Here is what the finished product looks like.
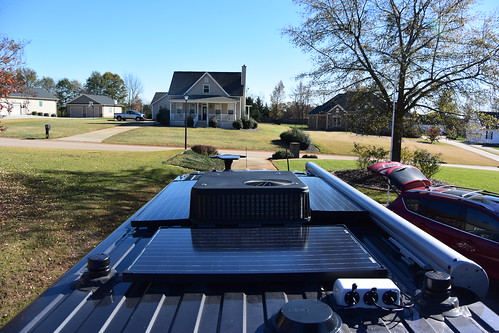
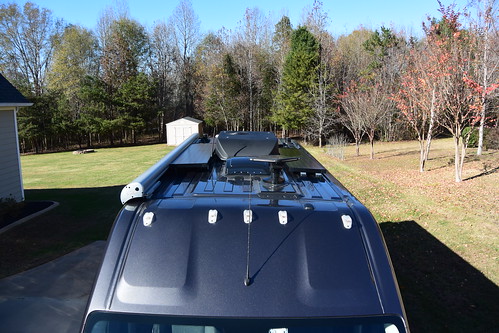 I don't think they stick up too much. I doubt there is much wind up there anyways as the slope of the roof pushes the air up and over the van.
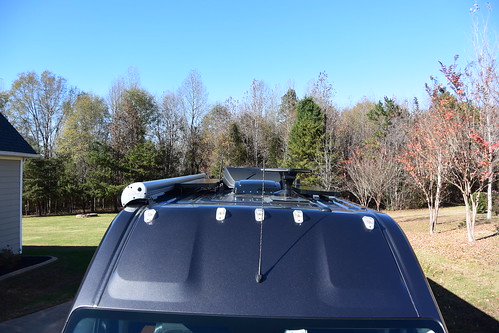 I could fashion a wind block for each panel. What do you think?For the wiring, I got Zamp specific cabling, cut to length and crimped & soldered quick connects on it, and the leads from the panels. I guess I got it right, as there is no reverse polarity error, and current seems to be flowing. The sun is fairly weak so I'm not getting many amps today. With one panel partially shaded, it's putting out 3 amps collectively.
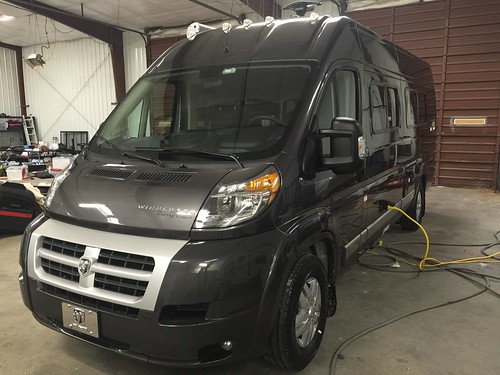
Well, my new Travato was delivered. This is a 2016 model 59K Winnebago Travato. This is replacing my 2015 59G. As you will see, the floorplan is completely different and has many additional features. It's certainly a different type of van, and I hope, fits my traveling style a little better. I'm certainly not going to say that one floorplan is superior to another. It's kinda like which ice cream is better - strawberry or vanilla? They are both delicious!
This van I ordered. Got it exactly as I wanted and didn't have to pay for items I didn't want. Also, since it was delivered to me 1 day after arrival, there was no sitting on the dealer's lot with people fooling with things and the batteries getting run down and damaged.
This blog entry is only to highlight some of the more interesting features and some of the customizing I've done so far. A more thorough review of all the aspects of this model will be forthcoming in a video I'll be shooting very soon.
The color is called Granite. It's a dark gray with a tiny metal flake in it. I think the dark colors help you blend in better if you plan to "stealth" camp. I have some trip ideas where that may be advantageous.
I fitted my chrome plated RAM front license tag for a little "bling".
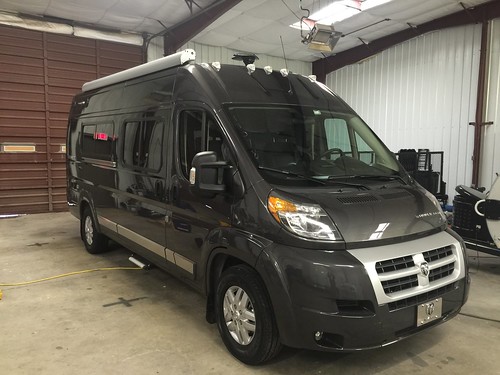
Overall, I think the exterior fitment, smoothness of the panels and around the windows is better than what I've seen on the G's. The paint work on the bumper covers and wheel trim is pretty good, but not perfection, but better than on my last one. I did have some overspray on the light gray grill. I removed that with some dish soap and a clay bar, so now it's perfect. These painted items and the stainless trim on the sides is called the "deluxe package" and costs extra. But it's a better look than the plain black plastic on the standard van.
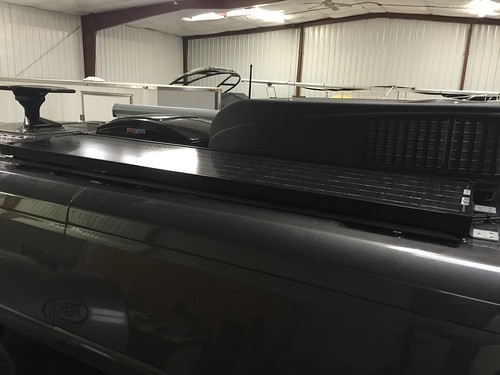
I ordered the 100 watt solar package. You get a 100 watt panel on the roof, a combiner box on the roof that will take a total of 3 wiring connection, an additional input on the side of the van for a portable panel and a 30 amp controller inside the van to control it all. Below, you see the extra 80 watt panel I ordered from Zamp and installed myself.
It's feet are mounted to the roof with a VHB tape (3M 5952 VHB Tape). It's the highest grade I could find and it appears really tough to pull off. I still have to apply the black dicor sealant over the feet and the wiring anchors I also stuck down. I have another 80 watt panel to install between the awning and the air conditioner, but I had to order taller feet so it would clear some items on that side of the van. I'll post more on that later after I get the parts.
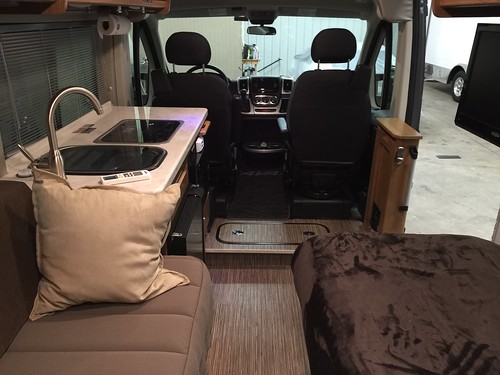
Now to look at the interior. One of the nice features of this model is the wide and clear main entry. It's really an inviting view.
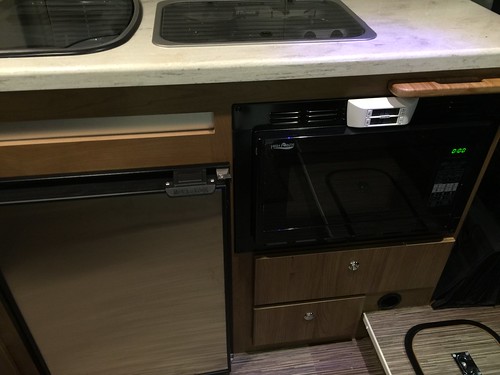
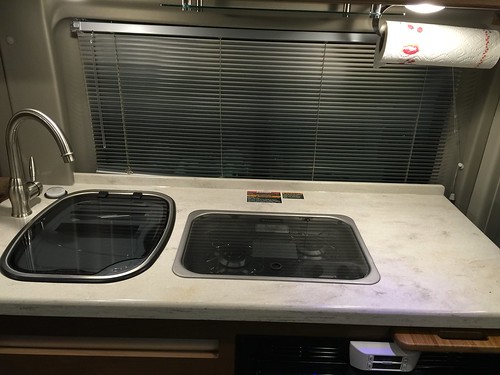
The kitchen is compact, but has everything you'd need - 4.3 cf 12v/110v refrigerator (really deep), convection microwave, deep sink with accessories (dishpan, drainer, cutting board, hanging utensil drainer), extra counter space and pull out extender.
Nice big work space with the stove and sink covers closed. Note the stainless steel paper towel holder I mounted with VHB tape.
View towards the front. Very open.
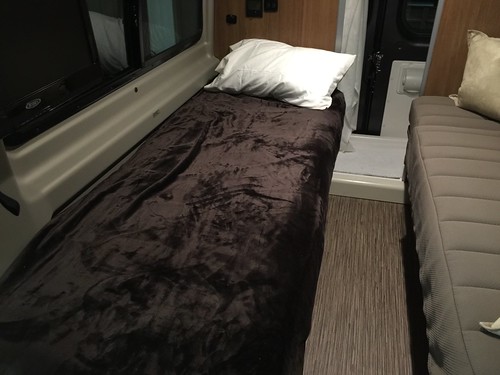
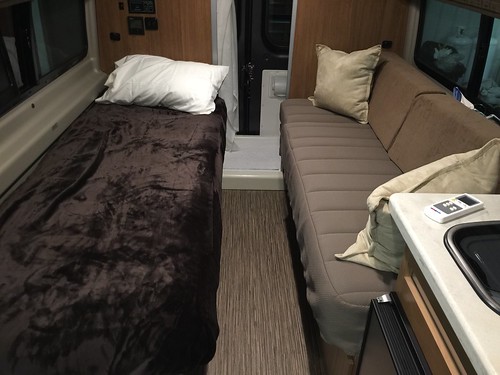
I planned to set this up with one bed made up and the other bed made into a sofa. For the bed, I put on a twin mattress cover and used a standard twin sheet set and a microfiber blanket of a medium weight. I can upgrade to a comforter for winter trips. Most of my trips are traveling alone (with just the dog). But I always have the option to take someone along and have a decent bed for them.
Note the bolsters I bought on Amazon (Wedge Bolsters). They are a dense foam with a microfiber velour covering. They come in a variety of colors, or you can buy individual covers and change them out if you get bored with the color. There must be a standard size for these things - these are 36" wide, 15" at the base, 9" at the top. I think the size is pretty perfect and they fit snuggly so they aren't going to move around when underway.
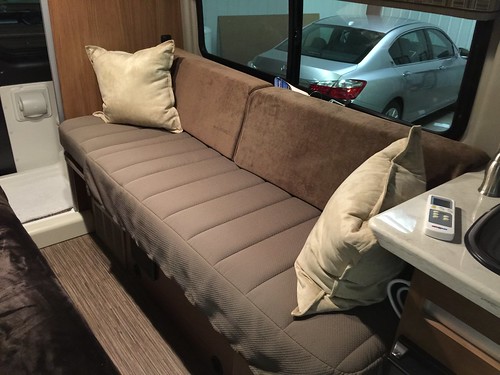
I'm a sofa person. I sit on a sofa at home most of the time, so this suits me well.
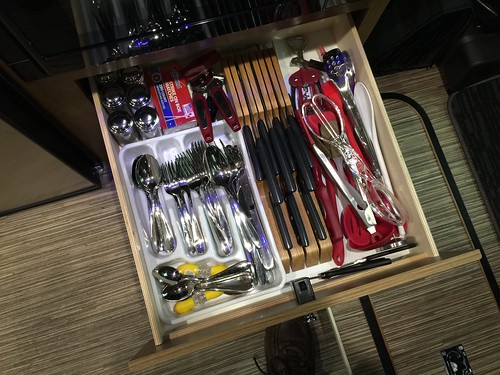
Much more storage for kitchen stuff above than in the G. I was able to add a few cookware items.
But the drawer space is alittle more limited. Mostly all my utensils fit in the large top drawer. Note I had to add a knife block, as there is no place for the knife rack I was using inside the cabinet on the G. In the bottom drawer, I keep pot holders and all my grilling tools, lighters, and tablecloth clamps.
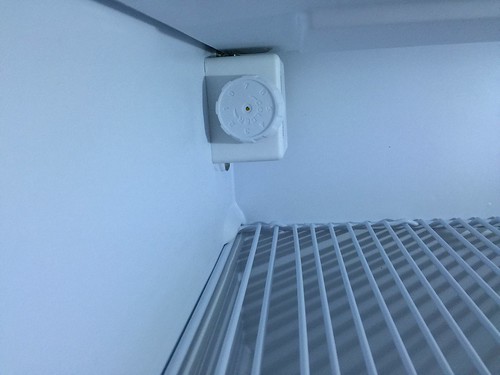
This is the refrigerator temp sensors I added. Note below, the fridge is at the mid-point to get these temps. It seems to hold temperature really well. No more worrying about be level, or flames being blown out like I did on the 3 way.
This is the extent of the controls on the fridge - a simple dial - off to max cold.
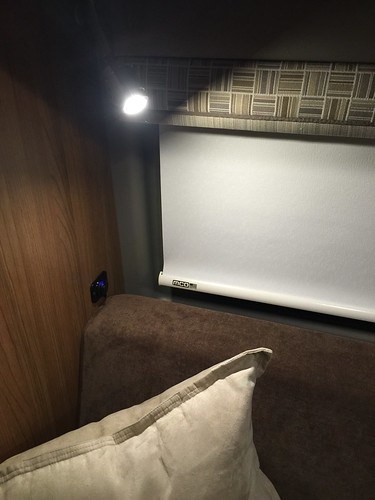
There is a long, tube type light on the forward bulkhead. Appears to be LED. Has two settings on a switch - high and low. It's very bright.
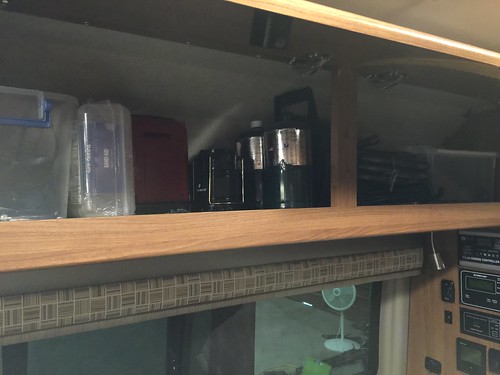
Storage over the bed. Some of the stuff that I was putting in the outside storage box will now go in here - electrical odds and ends, lanterns, outside lights, lp bottles, extention cords, etc.
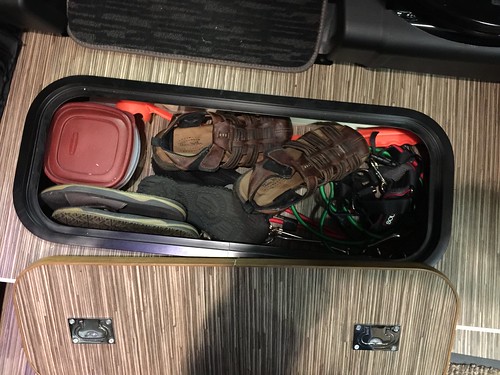
This is the compartment in the floor in the front of the van. It's around 4" deep. Great place for dog stuff and shoes, sandals, etc. This area extended off under the kitchen cabinet in the older vans, but does not in the new ones. It isn't any wider than what you see in the picture.
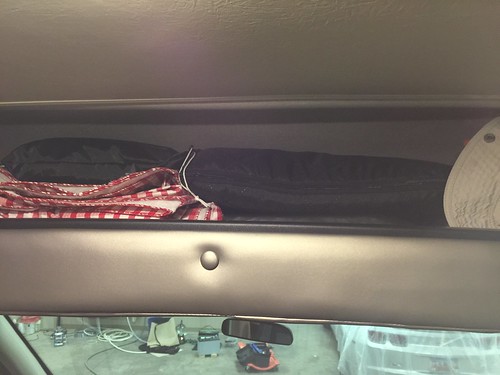
Above the cab is a cubby I use for soft goods - the window covers (these are also new and improved on the 2016 models), blankets, hats, bike helmet, etc.
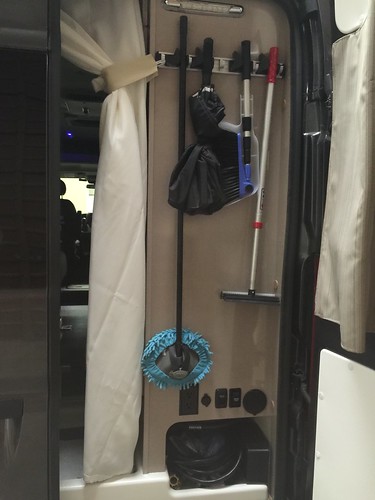
In the back of the van, I stuck on this utility hook set. I had to cut it down a few inches for it to fit as that rear bulkhead was wider on the G. But only took a few seconds on the chop saw. Great place for those items like the washing brush, window squeegee, broom and umbrella. Note I also hung the shower curtain full time and hold it back with a tie-back attached to one of these hooks. Less to fumble with. Still not thrilled with the shower curtain, but it will do until I figure out something better.
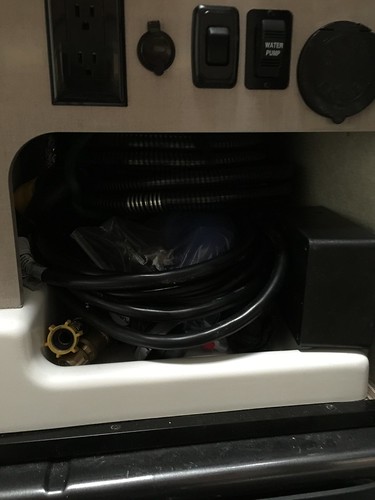
This is the wet storage under the bathroom cabinet. It's fairly deep - here is a list of everything I have in there: PD power protector, shore power cord, sewer solution with extra 10' hose, 25' coil water hose, end connector for "stinky slinky" hose, tire inflator and tire iron/jack kit. That is a lot!
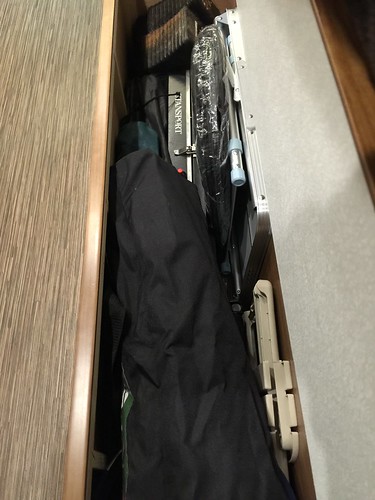
This is the area under the bed. That space is 11" wide, 19" deep and 54" long. I have all my outside stuff in there: grill stove, 2 pico chairs, grill table, side table, level blocks, wheel chocks, lantern pole, campsite 5' x 9' rug, & collapsible trash can.
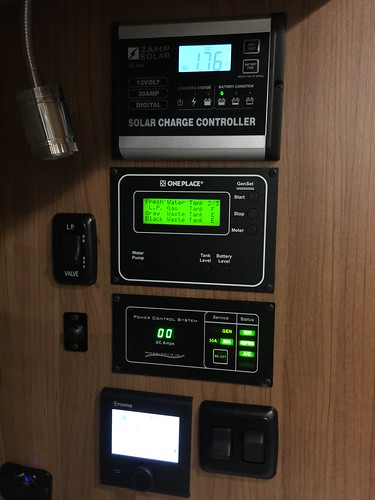
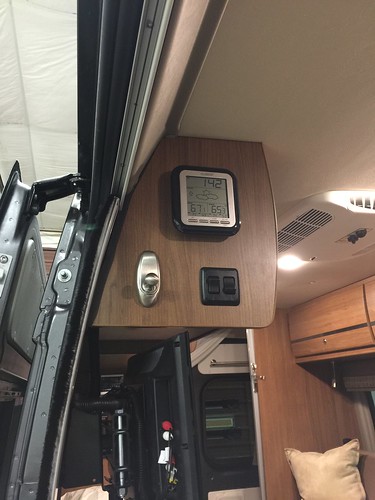
This is the electronic "control center". This is the heart of alot of new features that I wanted.
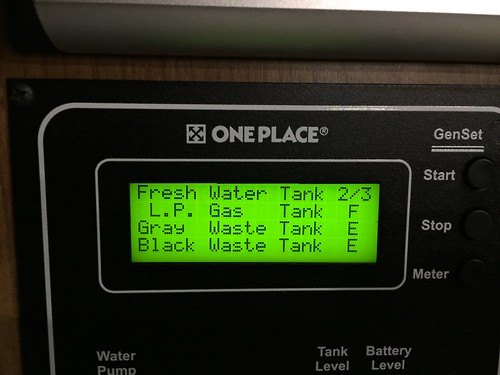
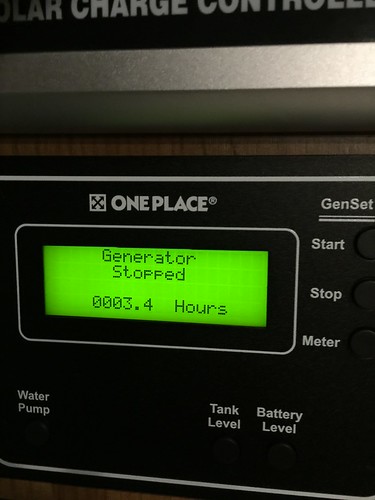
The One Place control system is alot nicer than the old system with the dummy lights. It controls the generator and water pump, gives you tank levels and battery voltages. The tank levels are minimal - you get E, 1/3, 2/3 or F.
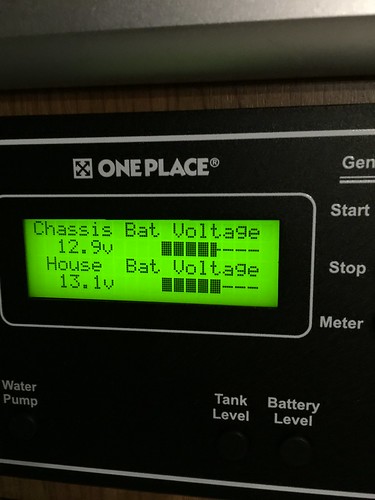
Gives you status on both the chassis battery, and the combined voltage on the two group 31 AGM house batteries.
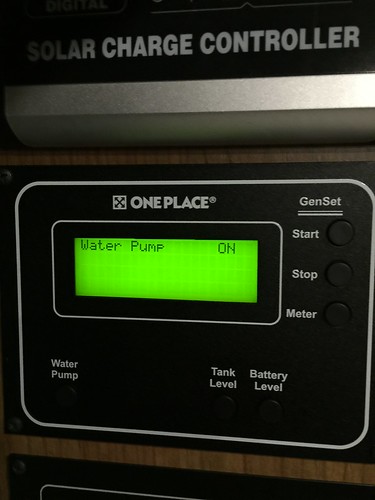
Turning on the water pump is just one soft touch button.
Generator control is just one push - either stop, start or you can check the hours meter. It also gives you a status statement - like Running, Stopped, etc. I also installed my EC-30W wireless Onan remote control/autostart unit. It works perfectly with the One-Place and gives additional statements on the diplay like Auto-Start, Auto-Stop, etc.
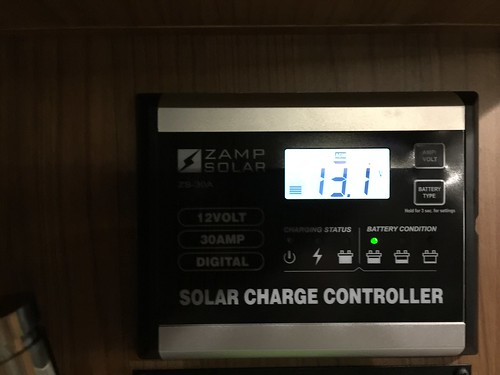
This is the solar controller. The display is quite bright, so it didn't photograph well. It gives you voltage, charging amps and amp-hours put in the batteries. It's basically a status display and you really don't need to do anything with it, other than enjoy free power from the sun.
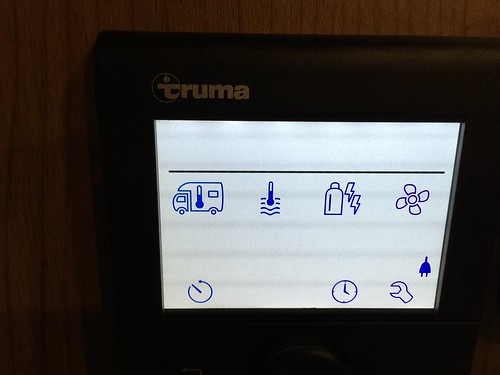
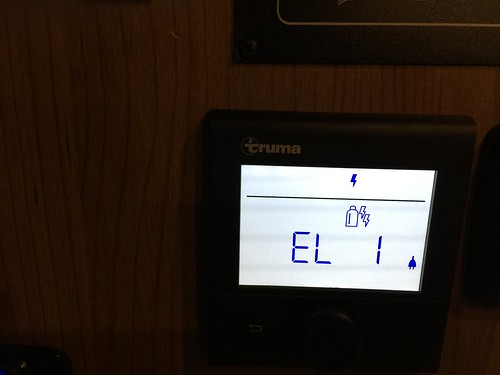
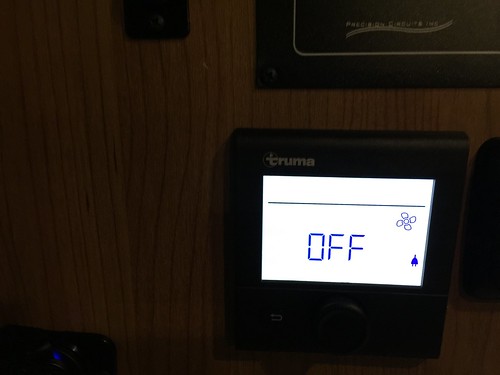
This is the primary improvement over my old van. The Truma Combi system. It's a highly efficient, combination unit that does both the van heating and water heating. You have alot of control over these functions and it will run on either LP gas, two modes of 110v operation, or a combination where it will primarily use 110v and switch to gas if power is interrrupted. Above is the primary display. There is a control wheel button (kinda like on an ipod) that you scroll thru these icons to set various aspects of the system.
The first stop is the van heating/furnace function. You set this to whatever degree you prefer. In the picture above, you see various icons telling you system status - OFF would be a number of whatever temperature you would set. The flame indicates the furnace is on.
The lighting bolt indicates the power source selected. The fan blade is the fan speed selected. The power plug icon on the right side indicates that shore power is connected and available.
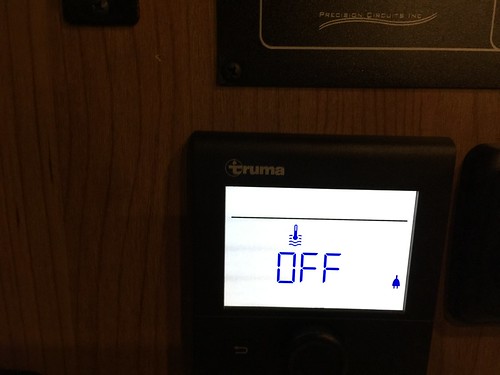
The next stop is water heating function. You select either off, 104 degrees or 140 degrees. Not as precise as furnace function, but it doesn't need to be.
The third stop is power source. Here you either select gas, mixed power low, mixed power high, 110v only low (850 watts), 110v only high (1700 watts).
The forth stop is fan speed. You have off, low and high. The other stops (icons along the bottom of the first display are timers you can set and the system settings menu. It's actually a pretty easy system to use once you fool with it for a few minutes. It works very well in 110v mode, which I did for several days plugged in on a drop cord in my garage.
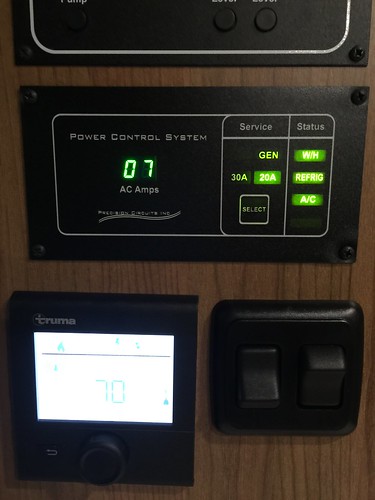
Another great feature is the power management system. The intent of this system is to shed loads so you don't trip breakers. You can set the system to respect a 20 amp power source (like on a drop cord in your garage) or a 30 amp power source like at a campground and using your shore power cord. But it also will work with your generator engaged to protect it from being overloaded. Note in the example above, I have some lights running and the Truma heating to 70 degrees in the 700 watt 110v mode. System is drawing 7 amps. On the status lights to the right, you see the big loads that would be shed if we were facing an overload situation - water heater first, then refrigerator, then air conditioner last.
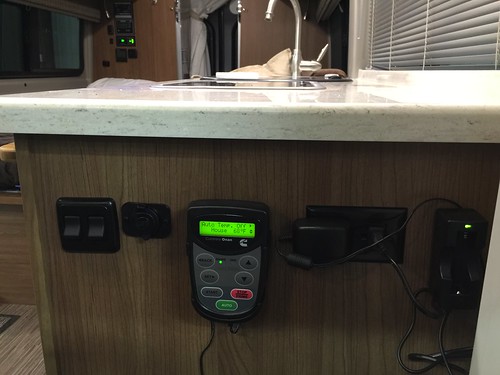
Here is where I mounted the EC-30W remote unit. There is a nice outlet on this end of the kitchen counter so I could plug it in (for charging it's rechargeable battery, but also for power sensing the 110v is active. To the right, I also mounted the charging unit for my LED flashlight - just pop in the battery in there every now and then. The nice thing about this location for the remote is that it is right behind the driver's seat. I can easily grab the remote and start the generator while underway.
Some other things I added like a thermometer (outside sensor is mounted under the retractable step) and 3M Command hooks. I put several hooks up - one outside the bathroom, one inside the bathroom, one here in the picture, and one near the grab handle at the entry.
This model also has nice, bright, articulating LED reading lights. These will really be useful.
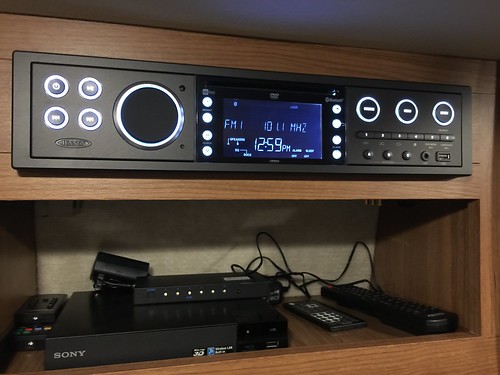
Last, but not least, the entertainment system. The stereo has some nice features and has some open ports for digital audio. In the cubby below, you can see there is plenty of space for some additional equipment. What you see here is an HDMI switch and a Blu-Ray player. There is still room for my Dish Tailgater decoder box. One of my next projects is to wire all this up using the HDMI switch for both items plus a Chromecast I like to use to project my laptop on the TV. To run these wires the backing panel on this cubby will have to come out - but that is easy as it's held in with 4 visible screws. More on that later!