ATTENTION READERS! I NO LONGER ENDORSE OR RECOMMEND THE SMART BATTERY. YOU HAVE MOST LIKELY COME HERE VIA A LINK FROM SMART BATTERY'S WEBSITE. I HAVE NEVER AGREED FOR THEM TO LINK TO THIS BLOG AND ADVISE THEM TO BREAK THE LINK. I'M NOW RECOMMENDING STARK POWER'S BATTERY AS A MORE ECONOMICAL AND MORE FULLY FEATURED CHOICE. CHECK THEM OUT AT www.starkpower.com
My Travato came stock with one Group 31 AGM battery from NAPA. This is a good battery, 110 AH. I could make it a couple days running lights, fantastic vent fan, entertainment systems and the water pump. Overnite with the furnace blower would be dicey.
Wanting more capacity, I did a project adding a second battery of the same type. I scabbed onto the existing battery frame and mounted another battery under my van. I wasn't exactly thrilled with the DIY look of this installation. It would work just fine - I doubled my AH capacity, but I was having anxiety about how this was mounted and found myself constantly checking under the van to see if the batteries were OK. So I started looking for another solution.
I've been talking about and researching putting LiFePO4 batteries in my Travato for some time. The more I looked into this, the more frustrated I became in finding information that agreed - mostly there are divergent opinions on usage, charging, etc. There is also a plethora of equipment to manage and charge these batteries. I like a simple approach. I wanted to not only reduce weight and maintain the same about of capacity that I had with my 2 AGM's. Also key to my thinking was to do something that was completely reversible if it didn't work out.
I started out thinking I'd install 2 or 3 batteries and really up my capacity. Or maybe one really big battery - an 8D size 300 AH unit. Then I could get a big inverter and run appliances like the water heater and the microwave. Well, if you can swallow the cost of all these batteries, there is definitely downsides. Namely you have major wiring rework to do and drilling holes in the van to pass these wires thru. The existing wiring from the converter was 6 AWG. The wiring from the alternator is 1 AWG. These are respectable sizes for a single battery, but inadequate for huge loads needed for multiple batteries. If I went down this road, there was major work, major cost and could still be a disaster.
So all that said, I started looking closely at the Smart Battery brand of "drop in" type batteries. These batteries come with a battery management system, or BMS, inside the casing. What this does is protect the battery from over and under voltage, so it can't be damaged from running it down completely, as well as an over-zealous charger. You can read all about these batteries at: http://www.lithiumion-batteries.com
Certainly there are other brands out there. AM Solar is starting to sell these type of batteries and Stark makes a very appealing battery as well. Problem for me, was there were some significant wait times to get one. Also, the Smart Battery has a 5 year warranty - the others only 1 year.
I selected a 100AH battery. This would give me the same usable capacity in AH, and save around 140 lbs of weight (about what I have in my Stowaway2 box!). It would fit in the protected, stout stock single battery frame the original Group 31 battery was mounted. Another benefit would be much quicker charging - it will take up to 100 amps of charge, so about 2 hours max to charge this battery with the charger I selected, a bit less charging with the alternator.
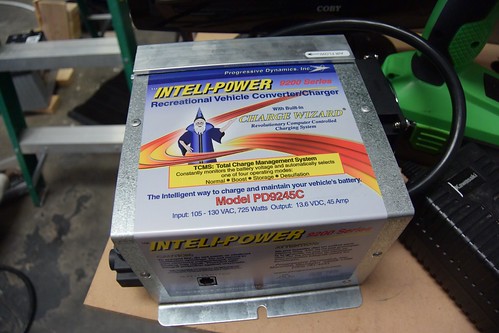
Since these batteries need a charging voltage of 14.4 to 14.6 volts, a new converter/charger would have to be installed. Lucky for me, Progressive Dynamics makes a Lithium line of products that are very similar to the charger/converters they supply Winnebago. In order to use all my existing wiring, as well as maintain the same power profile for AC devices in my van, I selected their 45 amp unit. This is the one I got: http://www.bestconverter.com/PD9145AL-45-Amp-12-volt-Lithium-Ion-ConverterCharger_p_604.html#.VaHG6UI-CRs
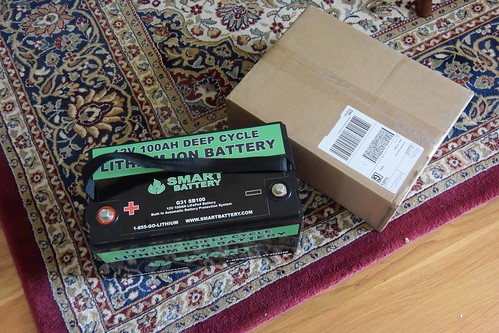
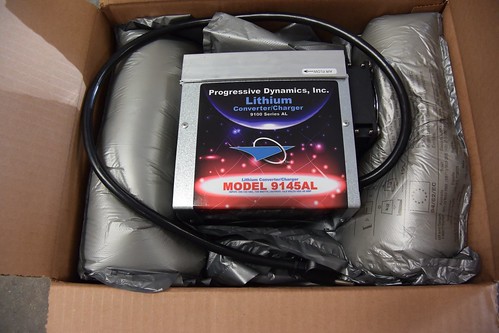
So here was what was waiting for me on the porch when I got home this week:
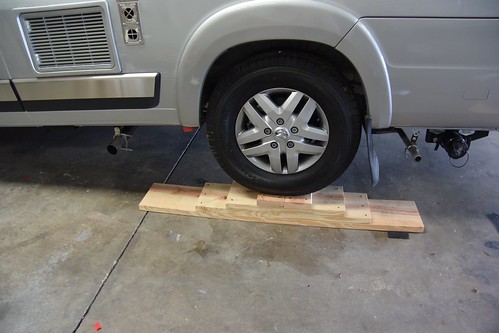
Step 1 was to improve my ramps a bit. I added another layer to give me a couple inches more clearance. The batteries had to be removed with a floor jack since they are so heavy and unwieldily in such a tight space.
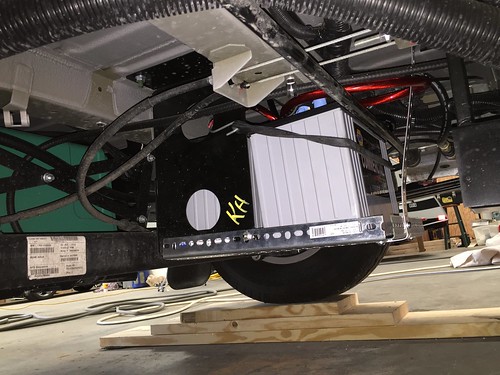
So all this had to be unbolted and removed:
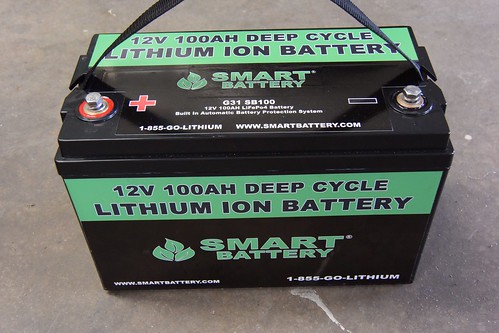
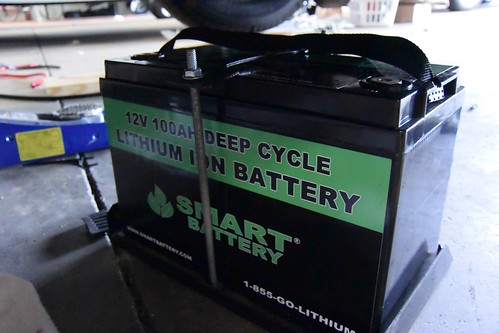
So here is what the battery looks like. These are the only markings. The case looks to be a heavy polystyrene, just like a lead-acid or AGM battery and completely sealed - no way to pry it open.
The new converter came well packaged. Surprising how tiny it is.
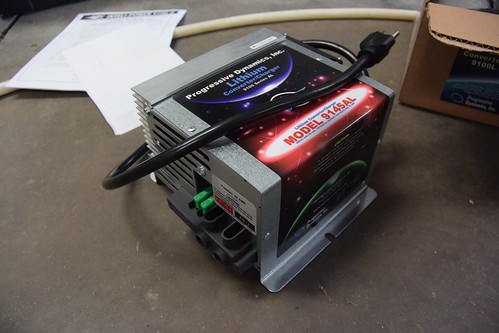
Here it is out of the box. All the wiring connections are exactly the same as the old converter. All the bolt holes are the same for mounting as well, so no need to drill any new holes.
After the old batteries were removed, it was an easy task to secure the new battery in the old tray and tighten the nuts to hold it in place. Lifting it up into the frame was an easy task, as it was only 28 lbs - no need for the floor jack.
Here it is mounted in place, with all wiring in place. I taped the posts for safety. I also re-installed the pigtail for my portable solar panel, just in case I want to use it.

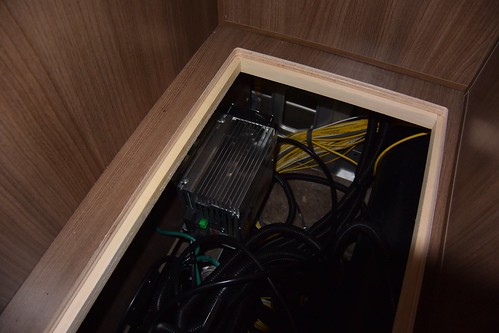
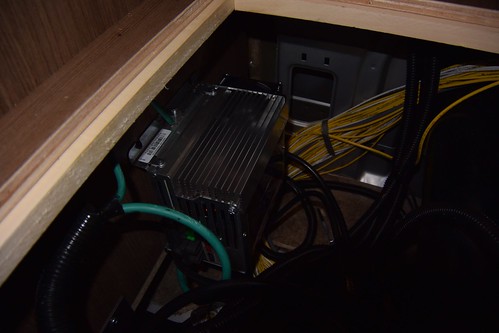
Under the closet floor is where the converter/charger is housed. The panel just pops out. It looks like a rat's nest, but everything is neatly bundled and there is room around it for cooling. There is an opening in this cabinet into the area under the dinette, for running the other electrical wires as well as give some more space for cooling.
Actually, there was enough slack in the wires, that after I unbolted it from the wall, I could hang it outside the closet and unscrew the connectors holding the pos/neg and grounding cables.

Here you see the new unit bolted in place, all wires connected:
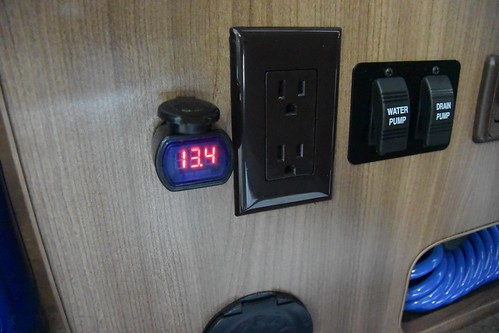
Now with everything complete, I turned on the battery switch to see what I have. Of course, everything came to life on the first try. Below is the voltage I'm reading on the 12v system. A bit higher than I'm used to seeing. Normally you see 12.7-12.8 volts here. Smart Battery told me that the battery would come with about 30-40% charge on it. They also say that they hold 12.8 volts almost all the way to complete discharge. To start, I'm more or less flying blind on what level of charge my battery will have. I will just have to see how it goes for now - I suspect it'll be good for my regular weekend type trips and get fully recharged on the drive home.
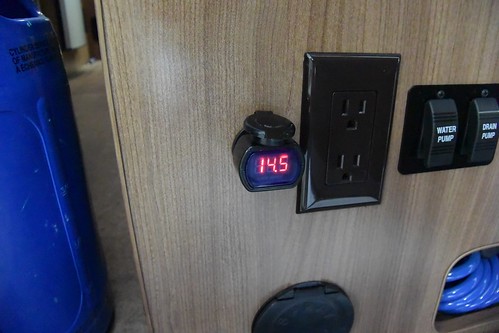
Here is the reading with the power turned on and the charger/converter activated. It slowly ramped up from 14.2 to 14.5 volts. I never did see the max of 14.6 volts, but that may be due to the van's interior 12 volt wiring system. Currently, I have no way to read the voltage at the battery. That may be a next project. The charger manual says that if you get 14.3 volts, it is within spec and is OK. The way this charger works, it should hold voltage always, but reduce amperage as the battery gets full. There should be no danger leaving it running, but I probably will not do that. After it's fully charged, I'll hit the battery disconnect switch and turn off the AC power until next time I want to use the van.
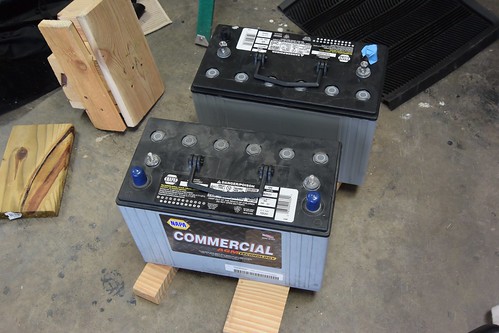
Here are the "old" batteries. They need a new home now. Lots of life still in them.
Here is the old converter/charger. It's a good unit. I'll put this on the shelf in case I ever want to go back to the stock install.
That's basically it. Now to do some endurance testing. Smart Battery says you can hammer these batteries. They have 108 AH total capacity and you can draw them all the way down each time between charges. I doubt I'll be that hard on it, but I have the protection of the warranty. The cycle time promises are 3000-5000 cycles, but that is a tremedously long life - not sure I fully buy it. 1000 cycles would be many years of service and I'd be happy with that. Surely there will be bigger and better (and cheaper) in just a few years time.
A final thing to consider. Lithium batteries will work in the cold, but they are not to be charged below freezing. It can damage them. So what I need to figure out going forward, is how warm this battery gets while it's working. It may generate enough heat (while being discharged) to keep itself above that temp. My van is not a 4 season RV anyways, and I rarely go on trips in the winter months. I could install a 12 volt heating pad, but I'm going to hold off on that for now. I store my van in a heated garage, so I'm not concerned about the winter months if I were to leave it on charge. With lithiums, you don't need to leave them plugged in - they will hold their charge for a year or longer, so I could just let her sit from December to March.
So we'll see how it goes. Hope you enjoyed my project. Please leave a question or comment below.
How much did it cost?
ReplyDeleteThe battery was $1299 and the converter was $185. Sounds expensive I know, but the options out there are limited and what the manufacturers like Roadtrek and Pleasureway are offering are alot more money than this.
DeleteI can't do a "B", but a lot of class "C" rigs have the batteries inside, usually in a step. By tossing the AGM jars and replacing the converter, this would bring a lot more capacity.
ReplyDeleteThank you for the writeup. I will be likely aping you with this soon.
Doesn't sound too expensive to me. Thanks for all the research and execution.
ReplyDeleteNice upgrade, Ron. Keep us informed on the performance. What's next? ;-)
ReplyDeleteI've been reading your write-ups for a while now. Always interesting!
ReplyDeleteI want to do Lithium too, but read more and more often that charging should not exceed 14.2V-14.3V. Don't know who's right, but that's part of the lithium enigma at the moment. Would love to read more about your experiences with these batteries.
Van Williams.
Awesome project! How is the performance?
ReplyDeleteSo far it's been great. I don't use an inverter, or have any real heavy loads, so I can get 2 or 3 days out of this battery running my ventilator, tv, stereo, led lights, water pump, etc. So I don't need to really closely monitor the state of the battery. Installing an inline meter would be a big project on this van due to the locations of the wiring. So far, I'm also not doing anything to keep the battery warm. If I plan to take it out below freezing, I'll need to insulate the battery and maybe install a heating pad.
DeleteEverything sounds great to convert my Pleasure Way but I do use in the winter time at the ski resorts where it regularly gets to well below freezing. Where did you get the info on that limitation?
ReplyDeleteIt's discussed on most of the RV forums. Also, the manufacturer will tell you the same thing. It can be discharged below freezing, but charging it will damage it. If you want to use in the winter months, I suggest wrapping with reflectix and using a heating pad.
DeleteIt is expensive, but I like it, I'll wanna try it
ReplyDeleteWhy did you switch to Stark Power? Did you have problems with Smart Battery? I am looking to get two 12v batteries to run my 24v trolling motor. These batteries will get pummeled when I am fishing.
ReplyDeleteFor a variety of reasons. Firstly, the Stark Battery is a different cell technology than the Smart Battery. The Stark is much more similiar to all the other leading brands. Second, it has a true BMS system in it. Smart Battery would never really give a straight answer on what the electronics do in their battery. In fact, they straight up told me that is doesn't even do the cell balancing that they claim. Thirdly, you can get a bigger capacity on the Stark - a full 25% more in the same size box - important. And lastly, I have my doubts about Smart Battery's business practices. If you read the fine print, and talk with them on the phone, you may have a tough time getting them to honor the long warranty. Currently, I've pulled the Smart Battery out of my RV and am using it on my trolling motor. It's probably pretty good for that service, especially since it's really light weight.
ReplyDelete