Tuesday, March 22, 2016

Mod Travato Bike Rack

Since I finally came to accepting the fact that I'm giving up on the Stowaway2, I am free to lower the bike rack to a more usable position.  In the high position, which is stock, it's not extremely difficult for a person of average height and fitness to lift a 25 lb bike and put it in the rack.  But as you get higher in bike weight, such as with an electric bicycle, it gets more difficult and awkward.   If you are on the shorter side, it complicates matters considerably and increases the risk of hurting yourself, your bike and your van.

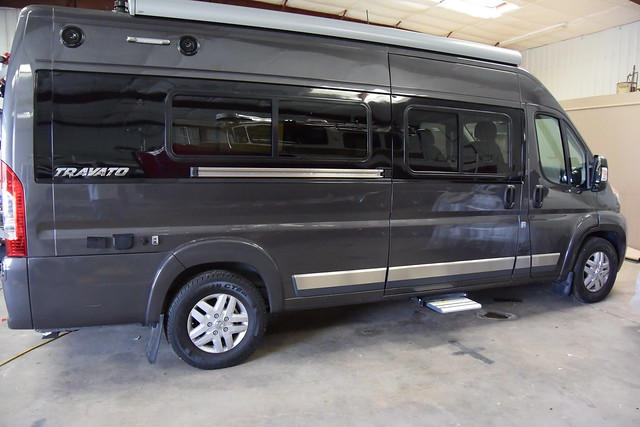
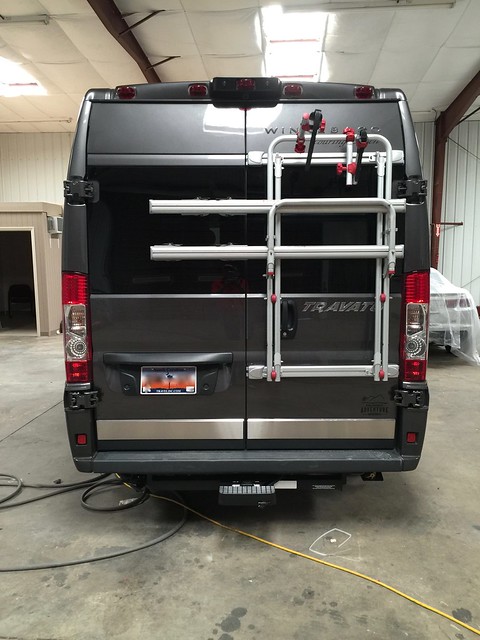
Also, I never liked how the rack blocked the windows.   Note in the picture below, at the stock height:


The rack has a lower setting.  there are a set of holes further down on the frame to mount the platform hinge.  It's just a matter of partially disassembling the rack, putting the platform on the lower points, and then bolting it all back together.   This involves removing the plastic nut caps and taking out 6 bolts.   You leave the very top bolts in place while you remove the rest, and reassemble with the platform in the lower position.  Not difficult task, just a bit fiddly.  Make note of which way your bolts are run, and where the washers were, as you want to reverse the process when you reassemble.

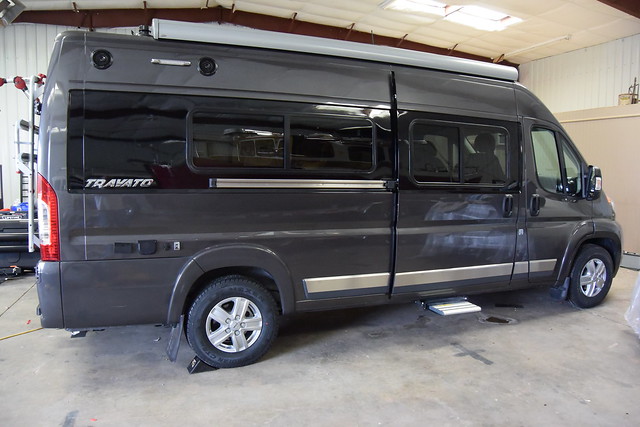
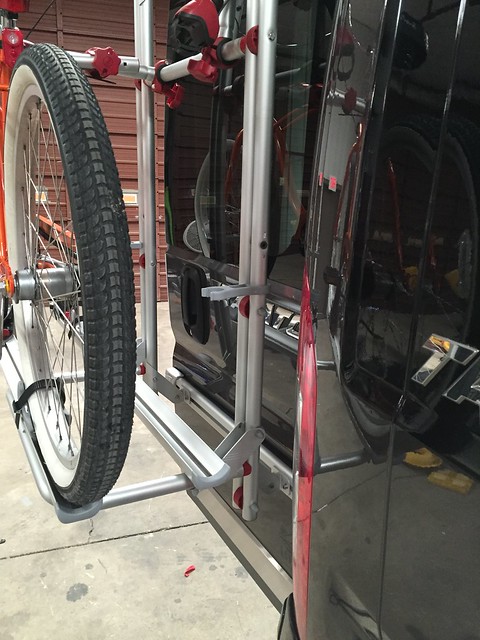
Here it is in the lower position:


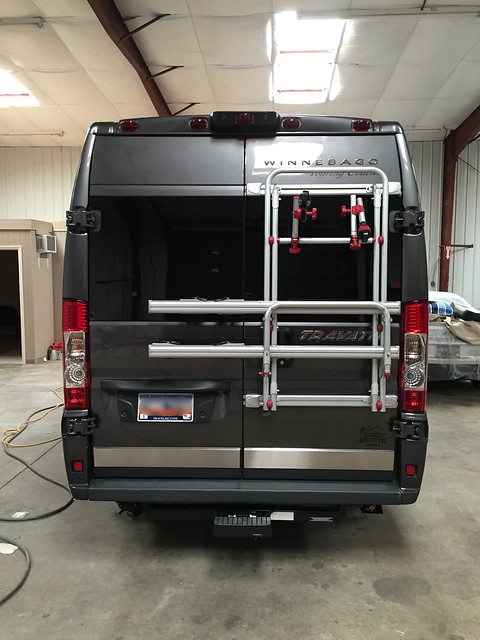
Note that now the windows are not blocked as much when you are without bicycle.  Rear visibility is still not fantastic, but it is much better.


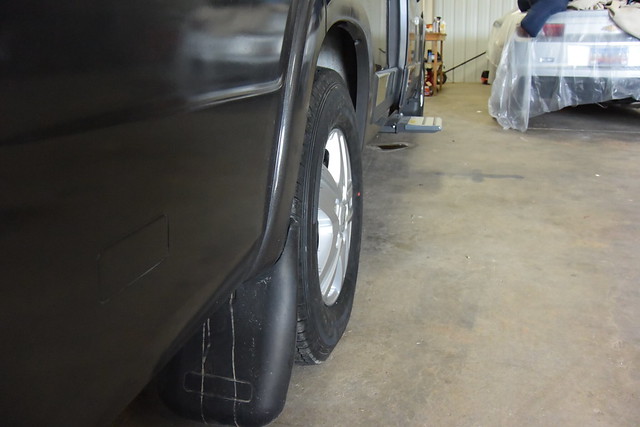
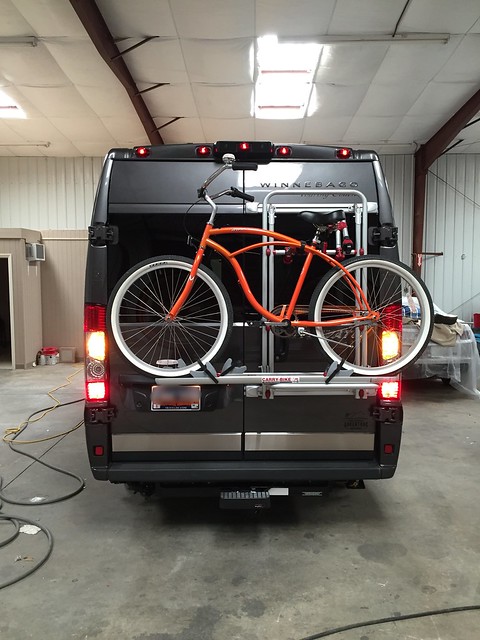
Now the platform, folded out, is at waist height instead of chest height.  Much better for loading the cruiser bike that I like so much.   Another concern I had going into this was if the taillights would be blocked.  The Ducato version of this rack has an accessory light kit that can be added to the rack.   But as you can see in the next pic, I don't think it's needed.


I also ended up lowering the top support arms from the top of the frame to the lower bar.
Much easier now to secure the bike.  No more stretching on tippy-toes to pull all the straps.


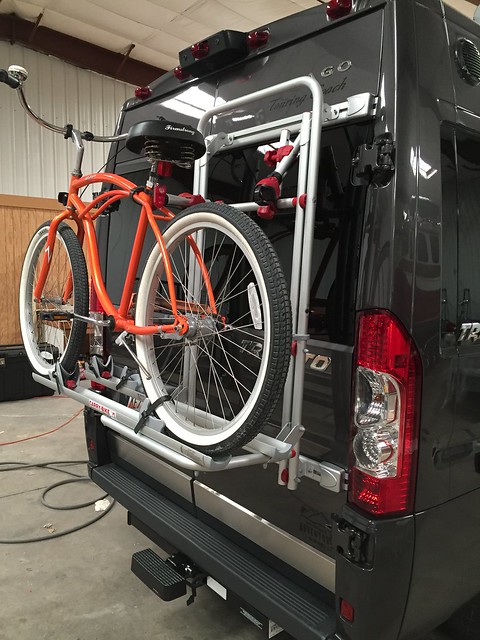
The wire that restricts the total travel of the door remains the same, as you can see, there is no danger of the bike's tire hitting the side of the van.


Mr. Bonz is a great supervisor here in the shop.  He lets you do your work without micro-managing.   He's a bit indifferent though, as he's giving me this look most of the time:


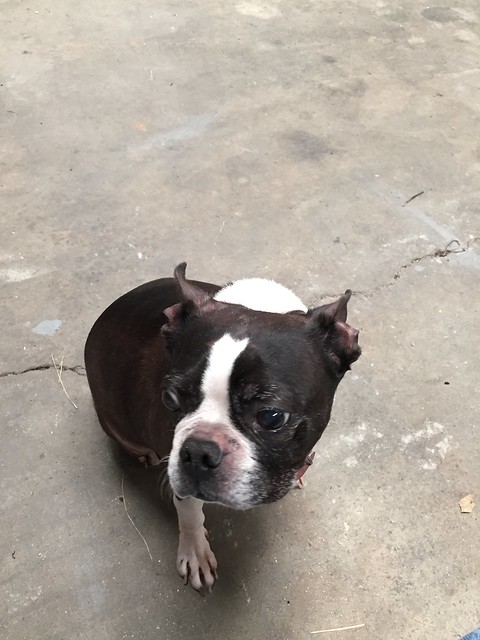
It's the "Meh, whatever.  When are going to quit messing with this bucket of bolts and take me to get some meat?" look.

Sunday, March 20, 2016

A few more mods on the Ranger

Today I did a few projects on my new R-27.   I installed a sound bar for the TV set, I installed my Magma grill from my other boat, and I installed a teak trolling motor mount on the railing.

The Insignia TV is fine, but the sound is really weak.  It's not wired into the stereo.  So I thought it would be easier to install a sound bar instead.   I found this one on Amazon that is USB powered and has 4 internal speakers.  http://www.amazon.com/gp/product/B014613640?psc=1&redirect=true&ref_=oh_aui_detailpage_o02_s00

The USB on the TV powers it, so you have sound when you are on batteries.  I had to put two screws into the bulkhead to mount it.   The wires are all zip-tied to the other wires behind the TV.


The sound is plenty loud enough for me.  Since it's connected to the audio out on the TV (instead of the headphone jacks), you can also still have sound out of the TV's speakers.

I had a barely used Magma LP grill from my old bolt.  I mounted it on the rear railing port corner.


Also on the rear railing, I mounted a teak bracket for my trolling motor.  This location was not my first choice, but the grill needs to be in the corner I think.  The bracket is nicely finished, but it was too expensive for what it is.  http://www.amazon.com/gp/product/B00GOML4IA?psc=1&redirect=true&ref_=oh_aui_detailpage_o01_s00


It seems on there well enough to travel with it on the trailer this way.   Most likely I'll only have it on there when I'm taking the dingy, which is not every trip.

Saturday, March 19, 2016

Yakima Skybox for Ranger Tug

Last week I bought the Yakima Skybox 12 Carbonite to mount on the sport rack of my R-27.
Of course, I got it on Amazon.

I wanted this particular model because it is only 24" wide (and 92" long).  Since I have the solar panel, I didn't want it to be slammed up against it and cast shadows on the panel.


It has a dimpled finish that I'm sure will prevent scuffs and scratches, but it also gives it a carbon fiber look.

Here it is mounted on my boat.  It was a bear getting it up there by myself, but it was only 40 lbs.  The mounting system is pretty easy with clamping mechanisms adjusted from inside the box.


I certainly wouldn't want a larger box than this.  It covers the lower part of the cabin top, but still there is plenty of room to open the skylights.


From the cockpit.


It looks close to the panel in this shot, but there is about 4" gap from it.


Looking back from the bow.  Hopefully I can still get out under my roll-up door!


Here it is opened up.   That's the extent of how far it opens.


New Wheels & Tires on the Travato

This week I got new wheels and tires for the Travato.  There was nothing really wrong with the ones that came with my van, but I didn't care for the styling and thought they were difficult to clean.

So I ordered the Rial Transporter 16 x 6.5" wheels in bright silver from the Tire Rack: http://www.tirerack.com/wheels/WheelCloseUpServlet?target=runWheelSearch&initialPartNumber=TP65666M61BS&wheelMake=Rial&wheelModel=Transporter&wheelFinish=Bright+Silver+Paint&autoMake=RAM&autoModel=ProMaster+3500&autoYear=2015&autoModClar=

When you order wheels from Tire Rack, you can also order tires and new TPMS sensor and have them assemble it all and speed balance them.  That's what I opted to do.  I got the same Nexen LT225/75 R16 tires it came with originally.  I've been happy with these tires so far.  They package the wheels with cardboard disks and wrapped banding around each wheel so it can be shipped via UPS.  From order to delivery on my porch was only 3 days!

Here's a pic of my van with the original wheels:


And here it is with the new ones. A similar, but less busy look, I think.


These look very similar to the wheels you get on the Peugeot version of the Ducato, but the wheel face is more flat, without the pronounced curvature found on the French wheels.


I aired them up per the sticker in the door jamb - 65 psi front, and 80 psi rear.  She drove beautifully over to my house where I gave her a bath and applied some tire dressing.


Note there is still good clearance in the rear wheel well.  This wheel and tire combo is identical to the OEM spec of the original wheels & tires.  The new wheels are 1/2" wider, so the tire sidewall has a slightly less curve to it, but not enough to effect anything.


I did weigh both the new wheel/tire combo and the old.  The old were 69 lbs.  The new were 67 lbs.   That's a total savings of unsprung weight of 8 lbs for all four.  Not enough to see any real benefits, but at least it's not the opposite.  A lighter vehicle is always better, so I'll take the savings.

Saturday, March 12, 2016

Malone Microsport XT Kayak Trailer

Today I put together a Malone Microsport XT Kayak Trailer.  Of course, I ordered it on Amazon:  Malone Microsport XT.  What makes this one an "XT" is that it comes with the aluminum wheels and the telescoping tongue.   That is a nice thing to have since you can "fold" this thing up and prop it up against a wall in the corner of your garage.  Also, it looks like you could put a really long yak on it - most likely a 17' sea kayak without issue.

What it doesn't come with is mounts.  Just the square loading bars.  There are a ton of choices out there that would work.  I just went with the Malone branded ones as they seemed pretty stout, yet were much cheaper than alot of the alternatives.

I also got some accessories - the Malone kayak mounts, the spare tire kit and the luggage/trunk accessory.  This trunk comes with mounting brackets and it's essentially a heavy plastic toolbox big enough to put some lifejackets and a kayak dolly in.

The bulk of it came all broken down and shrink wrapped to a palette (via Pilot freight service):


The installation instructions were pretty poor.  It does lack some important details on the bolts and washers to use in specific locations.  Someone could spend just a few hours editing the thing and end up with a really nice installation manual.   But eventually, I got it.  Took almost an entire day to assemble - 10:30 AM to 4:30 PM.  But it was a beautiful day to do this in the old driveway.

In the Amazon reviews, others complained about the instruction and missing nuts and bolts. I didn't have any problem with any missing parts, but I did have a few things left over.  Kinda scary that those big bolts are extra, but I went thru it again and there is nothing missing from the build.


To my amazement, the lights worked correctly on the first try!  It's a simple system you'd have on a boat trailer - incandescent bulbs and clip connections.  But it seems to work OK.

Well, here it is all put together with two of my cheap yaks loaded.  Did a road test and it pulls true and doesn't make any discernable noise, nor is there excessive bounce.


My final assessment?  I like it very much, and I saved alot of money over the Yakima trailer.

Friday, March 4, 2016

Travato 59K Surge Suppressor Install

Today I tore my 59K apart.  I wanted to install my Progressive Dynamics surge suppressor.  
Progressive Industries EMS-HW30C on Amazon

Of course, I couldn't finish because I had forgotten to bring my volt-meter.

But I did make some discoveries under the bed in the K.

First, you need to remove a bunch of long screws.  Nine on the curb side, and eight on the street side.  Also, on the curb side, I had to remove the adjustable back (4 screws) because it covered one of the screws holding the deck down.  Bring a screw gun to this fight - look at how long they are in the pics below:


This is under the curb-side bed.  Mostly a water tank.


The converter is nicely on a shelf.  It was noticeably cool, so I suspect the ventilation is better than in the G.  On my G, this space was quite warm all the time.  Below the converter shelf is the main 110 circuit breaker box.  Looks like there is plenty of room to install my Lithium charger/converter when the time comes.  The wiring is exactly the same.  You could also install a bigger charger if you so desired - there is a little room around the existing charger - depth may be an issue, as it's only about an inch above the converter to the bed decking.   I don't think there is room to install a Magnum Inverter/Converter/Charger if you wanted to seriously upgrade.

The rest of the compartment is the water tank, and of course, the storage area.


With a small area at the end with switches and a 110 outlet.  There is plenty of room to install another 12v outlet at the foot of the bed.  There are extra slots on the bus bar on the 12v system and open circuits.


On the street side, it's mostly plumbing and the Truma.  But the transfer switch is on the bathroom wall bulkhead.  Note that these Truma pipes looked kinked.  That is an illusion - what you are seeing is just soft insulation over the stiff pipes that are within.  I felt all of this for kinks and there aren't any.


The transfer switch:

Inside:

Here you can see a little of the stickers inside the box.  On the left input it says generator, on the right, shore power.


Of course, I didn't have my clamp-on volt meter to see if this is right.  But if it is, my thoughts are to clip this cable for the shore power input and install the surge protector in-line and mount it near the transfer switch.   I wouldn't mess with anything already inside the transfer switch box.

Well, the following day, I bought out my clamp on meter and confirmed that yes, the cable in question was the shore power line that runs from the transfer switch to the outside connector.

So I peeled back the black combing, cut the cable and installed the EMS-HC30W.   It was rather simple - you connect the 3 conductors on each side and button it back up.  The remote display is connected via a data cable on an RJ45 jack.


I decided to mount it on the edge of the bed cabinet near the refrigerator.   I wanted to be able to see it from standing at the sliding doorway, so if there is a problem with the power pedestal, I can quickly address it.


Wednesday, March 2, 2016

Delivery and Shakedown of my new Ranger Tug!

Monday, February 29, I took delivery of my new R-27.


They spent a good part of the day going thru the systems with me and how to drive the boat.  Considering the challenges of the shallow waters around Charleston, SC, I'm kind of amazed I hadn't run aground.  The Garmin 7612 is a pretty impressive system and was very intimidating at first - trying to use the features and watching for depth and the crab pots that seem to be everywhere.   By the end of the day, I was exhausted and brain dead.    Captain Tom really put me thru the paces, but he's a great teacher.   I didn't collide with anything, including the dock, so I call that a success.

Everything appears to be working on the boat.   The Mercury RIB they found for me (to replace the factory RIB) seems pretty nice.  They had the weaver davit system installed and showed me how to hoist it.   It appears that my Newport 55 lb thrust trolling motor is adequate to push it along at a good pace (but it won't plane of course) and the Smart Battery LiFEPO4 deep cycle I had (26 lbs) still showed full charge after an hour of putting around the marina and down the waterway.  So I'm happy with that.

Two disappointments though - first, the port side eyebrow had some minor chips in it.  Looks like the shipper might have hit a tree limb.  Dealer is going to touch it up for me.   The second, and more serious issue, is that Ranger decided to stop installing the seachllght on the 27 and a couple other models.   Considering no one mentioned this (and my dealer didn't know), nor is it even an optional feature you can buy if you want it, and it still appears in the sales pictures, I'm pretty upset about it.    My dealer said he'll find out about ordering one and split the cost with me.   Problem is it's a 200 mile one-way trip to bring the boat to him to install it.  So I'll have to make a decision when he comes back with a price.  But I'm sure I'll want it.

I've found out how to get an MMSI number for the AIS 600 and the VHF.  The instructions for each appear pretty clear to me, but oddly, it warns you must have an FCC license to enter it in the AIS.  But anybody can enter it into the VHF.  Go figure.
Also in the AIS instructions, it says you can enter vessel name, call sign and vessel type.  

I ordered the Garmin Weather SirriusXM antenna ($800+).  No instruction manual.  When you tap the media source on the 7612 and select SirriusXM, you just get a message to call the 800 number and subscribe and get a turner.  On the back of the Fusion stereo, there is a wire marked Sirrius Tuner that ends in an empty connector.    If I understand correctly, there should be weather information from Sirrius as an overlay on the 7612?   If the weather info a different tuner from the entertainment radio?   I'm completely confused about this whole thing and the dealer doesn't know anything about it. I also am getting sound on the Fusion stereo on Aux1 that sounds like the preview station on SirriusXM.  So there is that. (Later I found manuals online, and it looks like everything is there to get going without needing any additional tuners.  The XM52 is an all-in-one device.  The cables to the stereo's AUX 1 input are from the XM52 for the audio portion.  In the Settings menu (on the chartplotter) you can find the audio tuner ID# and the weather tuner ID# so you can purchase a subscription for one, or both devices.)

On the 120v panel, there are 3 breakers marked accessory that appear to do nothing.  Considering I got every option except the Webasto deisel heater, I'm perplexed as to what these breakers could be for.  Are they just spares?  Funny I also have a DC breaker marked Seach Light, yet I don't have a  Search Light!

Tuesday, I took the boat out by myself and got to go at my own pace.  I'm feeling pretty solid on the chartplotter and customized a few of the combo views.  I got the autopilot remote working and pretty much piloted around all day on the autopilot.  Really a fun thing to have!   I went all the way out to Fort Sumter, back up the Cooper River and all around the shipyards.   The sweet spot seems to be around 1800 rpms.  Not fast at 7 knots, but a smooth ride and 1.5 gal/hr burn rate, which is amazing.   Tomorrow we tidy up a few things and load up on the trailer and head home.


Not sure if this has been discussed, but my boat had this on each side:


My dealer says they just started putting these on.  Gives alot more room to step.

Today they plucked me out of the water with an enormous forklift and put me on a trailer. 


Then they got me cleaned up, loaded on my new triple axle and adjusted it to fit.  Also got my gel-coat touched up on the brow.   Looks good.  They also deflated my RIB, put it in the bag and loaded that as well.


I heard back on my search light.   Ranger also won't sell one to my dealer.  So he found one direct or from another supplier I guess.  $1300, so my end will be $650.   Oh well, that's to worry about another day.

The drive home was a bear at first - 20-25 mph headwinds, it was really blowing.  By the time I got to Columbia, it had settled down and it was easy going from there.  9.3 mpg was all I could manage in my 2500 Duramax.   I am really glad I didn't get a bigger boat.   This 27 is the maximum I ever want to tow.   Any wider would have been a problem on some of the streets I must traverse to get to my storage.

Here we are tucked in at my shop.  Snug as a bug.  At 12'3" on the trailer, she just slid inside my roll-up door.