Showing posts with label Winnebago. Show all posts

Tuesday, August 14, 2018

My 2019 Travato GL Ordeal

I picked up my new Travato a few weeks ago back in South Carolina. This is the 4th Travato I've owned. This is their new "L" model with the lithium batteries, big inverter and a 2nd alternator for charging the battery bank.  The power of this system is so great, you can run the rooftop air conditioner for 6 to 8 hours before the engine kicks on to recharge the batteries.  It was over a week late coming out of the factory, and the delivery company took their sweet time getting it down to my dealer in SC.  By the time I could pick it up, my vacation period was coming to an end, and I needed to return to California.   So I had to go, and instead of a leisurely and sight-seeing meander making my way back to Cali, I had to hump it across country in four days.  Four very long days.

So I was not exactly pleased with Winnebago, or my dealer, frankly.  If I hadn't pestered Winnebago Corporate, my van would have taken another couple weeks to get to my dealer, and probably another month before I could schedule a time to come and get it.

In hindsight, I probably should have taken this as a sign from the gods and delayed everything and given my dealer ample time to tinker with it and do a thorough PDI.

But alas, that was not to be. Immediately on my trip west, I noticed that I had several items wrong with my new van.  First, and most importantly, the 2nd alternator was not charging the batteries.   When I started out, I turned on the inverter, and then the air conditioner.  In my hubris, I was planning to run coast to coast, never once turning off the air conditioner.  Well, I made it 6 hours before the battery was so low, I had to turn everything off and look for a campground where I could plug in.   I felt so defeated and depressed!   Damn the gods!

The second thing wrong was the One Place display that shows you your holding tank levels is missing two pieces of information - black tank level and LP tank level.   This item I later got working to show the black tank level by employing a trick I learned on the Facebook Travato Owners group - fill the tank and reset the One Place.  That worked for the black tank, but still no LP level - it already reads full on the tank itself.  So I called my dealer to get a replacement.  Calls to Winnebago were useless on both the alternator issue, and this One Place gizmo issue.   The third issue is an ill-fitting passenger leather seat back.  Looks like the opening for the seat belt tensioner was cut too big.  This item can wait a bit.  Most likely it will need to be replaced.

Well after a couple calls to Winnebago customer service about the alternator, I was getting nowhere.  They were basically clueless on this new Volta system, as was my dealer.  In all fairness to my dealer, he would have been happy to get this fixed up for me without any anguish on my part.  Problem was, I was 2400 miles away, with no plans to return (or time to do it) for many months.   So once again pestering Winnebago Corporate, I got them to have the system vendor (Volta) help me directly.

I was able to conference with several of their people over a few days.  They all seemed very knowledgeable and professional.  I got out my trusty multi-meter and I took off the cover to the alternator control module and we tested the connections and the three relays inside the box.  I tested the connection of the wires at the alternator.  Several cut fingers and a burned forehead (on the exhaust header - ouch!) later, I was still at square one.    The system would charge off the shore power, but I was getting nothing from the alternator, and nothing I could discern from the solar.   The solar is really a drop in the ocean for a battery this big (~10,000 watt hours).   At a minimum, it should be able to keep the battery level stable with the draw from the refrigerator and the parasitic draws from the inverter idling and BMS (battery management system).   But no.  I suspect if the alternator was allowed to send current to the battery, neither was the solar controller.

So Volta sent me a complete replacement for the alternator control system.  This box was a simple plug and play - pull the old one out, plug the new one in.   I did that in a few minutes, but no luck - still a blinking red fault light and no charging.   Now I was starting to get nervous - what else could it be?

Volta management agreed to get with Winnebago, arrange a shop space near me in California, and send one of their technicians out to fix me up.  I couldn't believe it!   They ended up getting a shop space at LaMesa RV in San Diego and we scheduled a time for Monday, August 13.   We hoped he would find something simple like a loose connection, and I'd be on my way in no time!   Well, it was a good plan anyways..

First, I'd like to say a big thank you to the folks at LaMesa.   I've thrown shade their way in the past as one of the dealers that "needs work" as far as service goes.  They were very generous at giving us some shop space at thier sales lot on Copley Park Place.  This worked out well, as all they do there now is delivery PDI's and minor repairs on units during delivery.  So it was fairly quiet and we felt we weren't in the way or roadblocking their regular customer's work.   For most of the day, it was somewhat shady:


First thing the Volta tech did was re-check all the voltages and ohms I had measured.  Then he went thru measuring and verifying all the wires from the alternator control box.  No dice.

He had brought a new replacement alternator, and installed it.  Still nothing.


Now things were getting a bit more serious.   Out came the laptop computer, plugged into the battery pack (it has a USB connector).   From the program on the laptop, you can see all the aspects of the battery cells and what instructions the BMU is giving.  It was showing normal operation, but we still were not getting any charging coming through.   I could see some panic developing in our technician.   The engineer was wanting him to drop the battery pack out of the van!  This is a 250 pound box and is difficult to reinstall even in the Winnebago plant with a crew of assemblers.

In this pic, we have the side cover off the battery pack.  You can see the heavy duty power leads - there are two sets of 4/0 sized cables - one for the inverter, and one from the alternator.  Around the center you can see the umbilical for the control wiring harness and the USB port with the cover off and hanging down.  There is also a master on/off switch.


So we were lucky to have a lift at this shop.  What we struggled to find was a way to hoist the battery box out of and back into the van.  We thought maybe a floor jack would do it, but ended up using this ancient generator lift table and some wood blocks.  It was just barely tall enough to do the job.  Key word being enough.  It worked great.

First you have to remove the bottom of the insulated weather enclosure.  That is the lid you see laying on the deck of the lift:


Under that, you see a frame that holds the battery box with 4 large bolts.  So we positioned the generator lift table under the battery to support it's weight and proceeded with unbolting it from the frame.


 Here you can see it lowering down.


 ...and down....
 ...and down....

...and out!  The thing on the top is the connections for the temperature probe.  


Here is the inside of the battery enclosure looking from driver's side.  Note it's all insulated with 1" foam.  The black steel is the supporting frame.  You can see the temperature probe wires hanging (white) and the heavy black cables which are the inverter and alternator cables, plus the control cable wiring harness.


Here is a closer look from the passenger side.  Note the blower mounted to the far side.  This blower draws warm (or cool) air from the cabin into this enclosure.  The thinking is that this will keep the battery warm (within it's allowable temperature range for safe charging) in the colder months, as you would have the heater on inside.  Lithium batteries must be kept above 32 degrees F to be charged safely without damage.


Per the request of Volta, I did not photograph the inside of the battery box.  That might reveal some proprietary aspects of their design, and I had to respect that.  What I can do is describe some aspects of what is inside there.  Firstly, this box appears to be weather tight.  You might have noticed all the screws in the lip around the mid-point of the box.  This lip has a rubber gasket to seal it up.   Once you remove all those allen-head screws, the top comes off.  Most of the box is dedicated to the battery modules - this one came with 3 modules and room for a fourth.  There is a fairly large, but thin, plastic box inside that contains the BMU.   I assume it's a computer circuit board and has wiring connectors on it, connecting it to the battery modules and to various relays and the main wiring harness that goes up to the inverter and the alternator control unit.   The rest is the shunt to measure SOC (state of charge) and various relays and wires.

Several of the wires have diodes in them.  Diodes assure that current only flows in one direction - kind of like a check valve.  They also act as fuses if they are blown.

The diodes on the alternator sense appeared normal, but did not test as normal.  They were shot!   Funny how such a small thing could stop up the whole works!   Literally a 10 cent part.

Now that we had it all apart, another call to the engineer to see if we should do anything else.  We had hoisted the battery up enough to reconnect all the cables, and started the engine.  Still no charging!  After some back and forth with the engineer, it was decided to just play it safe and replace the whole BMU.  It would take another 1/2 hour, but was deemed worth it.  Thankfully the technician had brought a spare!

At this point, we were running out of day, and the management had come by to warn us they were closing up at 6:30 pm.   So we decided to put everything back together and hope for the best.  If it didn't work, we'd have to regroup and figure out what to do next.   So that is what we did.  It was certainly not easy lining the battery up with the frame and getting the bolts back in, but we did it.   Once every screw was in, and every wire connected, came the moment of truth.   Starting the engine on a manual auto-start and waiting to see what happens.  The engine started and proceeded to high idle. We had a green light on the alternator control box!  We had a rising voltage on the inverter control display!   We had a rising SOC value on the main gauge!   Success!

After all the thank yous and pats on the back, we rushed out before we'd get locked in.  My drive home was uneventful, but I kept watching that climbing SOC gauge in my rear-view mirror.  Even with some stop and go traffic, my gauge was on 60% (up from 18%) by the time I got home 1 hour later.

So a big thank you to Volta, LaMesa RV and Winnebago.  Here's to hoping the repair lasts and this van becomes as reliable as the others I have owned.

Sunday, January 15, 2017

New projects for the Travato! Installing a new lithium charger.


For a while, I've been wanting to install a better, more powerful charger and an inverter in my Travato K.   Because of the electrical layout of the K, a combo inverter/charger would be a challenge to fit.

Kisae is a respected brand in the nautical world.  They so happen to also make their units long and narrow, and not the boxey casings you'll see in the Magnum or Xantrex.

First up is to install my charger.  What I got was the Kisae Abso AC-1260.  I also bought the remote display panel for it to mount on the rear bulkhead.   With the shallow deck where the original converter/charger is mounted, it should be a really tight fit!

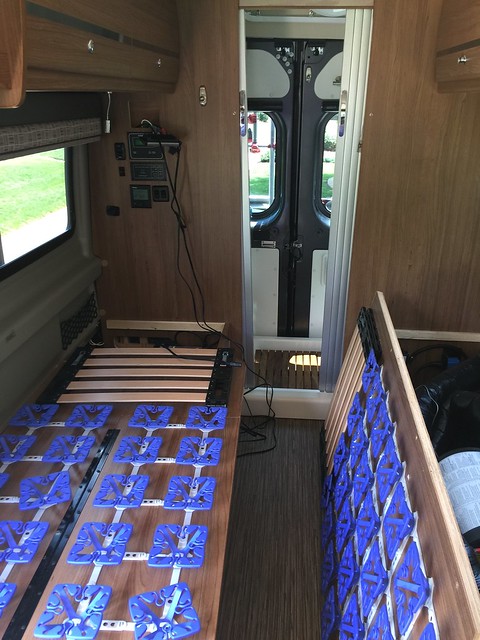
First step is to remove the beds mattresses and bedding.

 
Then, with a screw gun, remove the two dozen or so screws and take off the bed decks, exposing all the mechanical & electrical nether regions of the Travato.


Here you can see the lithium type Progressive Dynamics converter I was using.  This is a relatively low power charger - rated at 45 amps (700 watts AC).  It was a direct swap out for the Lead Acid/AGM type that comes stock with the Travato.   It worked fine, but with two big batteries, I wanted faster charging.  Also, the PD charger would still apply voltage (but 0 amps) to the batteries after they were full.  I did not think this was a good idea for the long term health of these expensive lithium batteries.  The Abso charger will shut charging off and go into sensing mode wihen they are full.


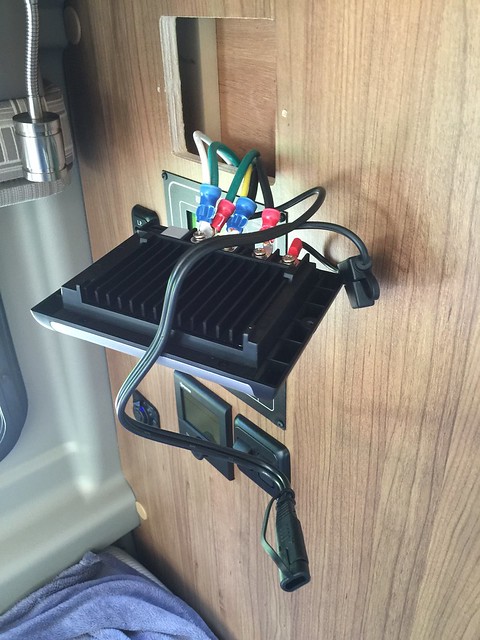
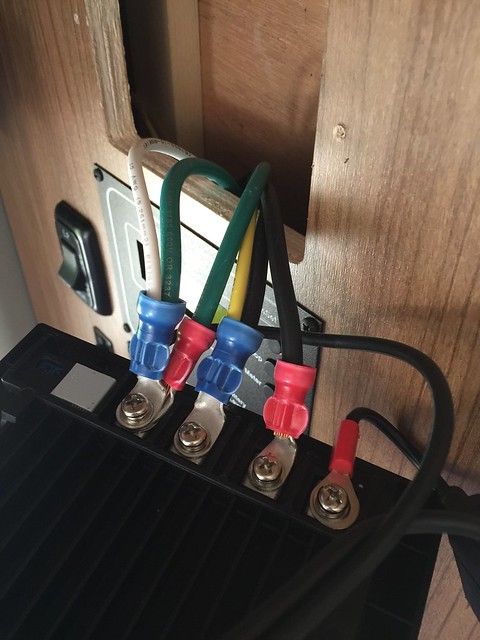
Here is the new charger.  All the wiring connections are on one end, the display panel on top.   I did have to wire a plug for the AC input.  That was easy - I just snipped oft the end of a three prong extension cord and connected it to the charger's leads with butt connectors.


Here you see the old converter removed.  The positive, negative and ground leads hanging.
To make additional room, I had to unscrew the power outlet from the deck and move it to the end of the deck.


Another thing I had to do was make a space for the remote display/control panel.
To do this, you have to make a template, mark it out, drill a hole on each corner, and then use a jigsaw to cut the hole in the plywood bulkhead.   To complicate matters, there is a mass of very critical and fragile wiring in the space behind the bulkhead.  To help with this, I had to remove the dsiplay panel for the Truma system, and push back the wiring to make room for my jigsaw blade.   Be very cautious doing this, and not only could it get really expensive, really quickly, but it's very easy to hurt yourself seriously.


Here is the new charger mounted in place with the cabling connected.  As you can see, I didn't change out any cables.  The existing 6 AWG cabling is sufficient for the max output of 60 amps of this unit.


Here is the Abso display mounted with all the rest.


As I said earlier, this unit is shallow enough to fit with adequate clearance around it.  The compartment is fairly large and the air can escape to other areas, so I'm not really worried about it getting too hot in there.


Re-installed the safety covers over the AC and DC wiring.


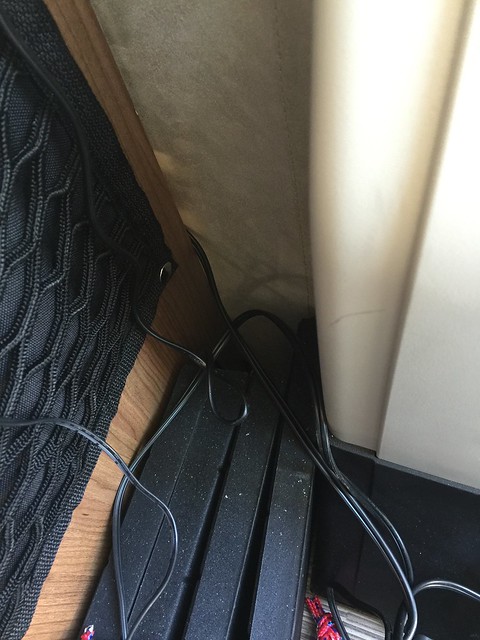
Here is the power outlet pushed up tight against the bulkhead.


So far, it seems to work really well.  It would only put in 35-40 amps into the batteries, as they were already mostly full.  It went into silent mode as expected.   The only problem is my remote display is not working - it displays normally for a few seconds, then reverts to showing "ErA" on the LCD.  I have no guide as to what that means.  So I need to call them and get it resolved.  If I have to buy a new one, they are only $59.

Next up, the inverter install!

UPDATE:  I called the people at Kisae about my issue.  Turns out, my charger was manufactured in May 2013, yet sold as new in August 2016!   The software in it was out of date and would not recognize the remote display.   It's not user update-able.  So they are going to send me a new charger unit.   The are even going to send it prior to receiving my old one, which greatly reduces the inconvenience and is great customer service.

UPDATE #2:   I got my replacement charger from Kisae today (1/18/17) and installed it.  Easy peasy - the display works correctly now.  Happy Camper!


Wednesday, May 18, 2016

Exhaust Resonator, Rewiring a Portable Solar Panel & a Few Accessories for the Travato

Getting this resonator installed was a long time in coming.  I bought it in 2014 for my original Travato!   So I had a local shop put it on for me.   They do oil changes and muffler work - mostly exhaust pipes on collector and classic muscle cars.   To my surprise they said they'd be glad to do it.

Others have reported that their shops would work on this type of thing out in the parking lot.  I assume they would remove the pipe and bring it inside to weld on the resonator and then bring it out and bolt it on.  Well, my guy wasn't going to work that way - he wanted the van inside the shop and on the lift!   I almost backed out of doing this, as it was extremely tight getting her in thru the door and onto those skinny tracks on the lift.   He was able to raise it about 4-5 feet off the deck, but there were no inches to spare between the ceiling and my air conditioner.

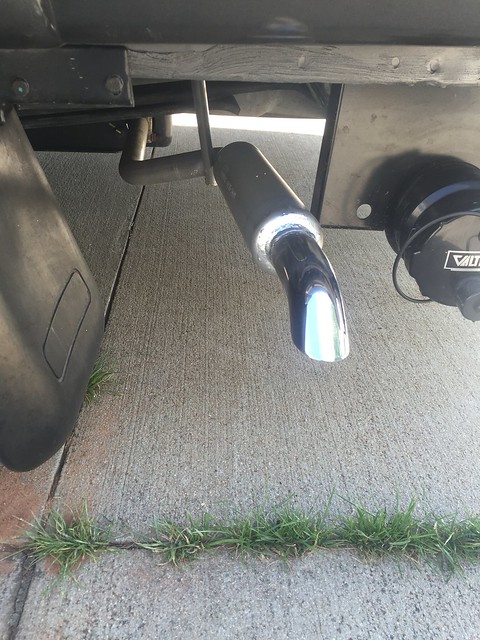
But it did make the work much easier, and thus quicker.  He cut off the pipe with it still attached to the generator.  Welded the resonator in place.    He did cut the downpipe I brought in and welded that to the resonator first.    I wanted the downturn to try to knock down alittle more of the noise.

We also welded on a new modern type hanger.  He bent it around the tailpipe to give it more support and also because the tail pipe was a very thin metal.  Here it is all installed - took about 45 minutes.


He painted on some cold galvanizing to cover the new welds.   Checking underneath, I see no evidence of all the sparks flying.  I was quite concerned about the waste tanks and wiring under there, but they appear unscathed.   It all seems very secure, but there is still some give in the pipe for the vibration.  The hanger has a rubber connection to the van's body.


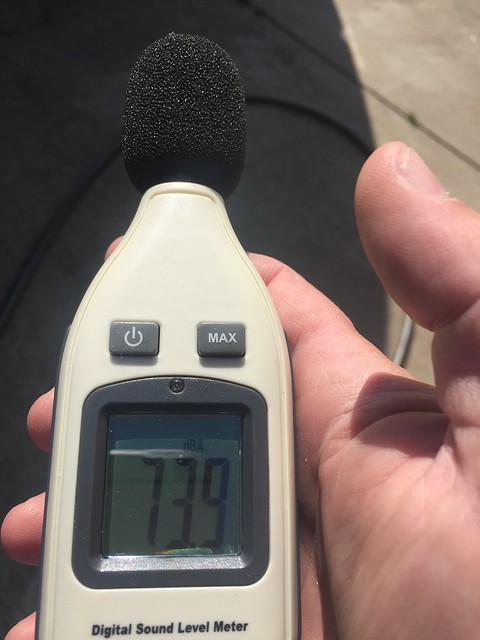
With my handy dB meter, at around ten feet, I'm reading 74.   Not a great deal lower than what I measured back in 2014 (see my post on that test).  Inside the cabin, it was considerably less noisy - 60 dB.   The biggest difference is in tone.  It's alot less harsh of a sound.  Much lower tone.   


Not only am I happy with it, but it was cheap!  That's the kind of bonus I like.


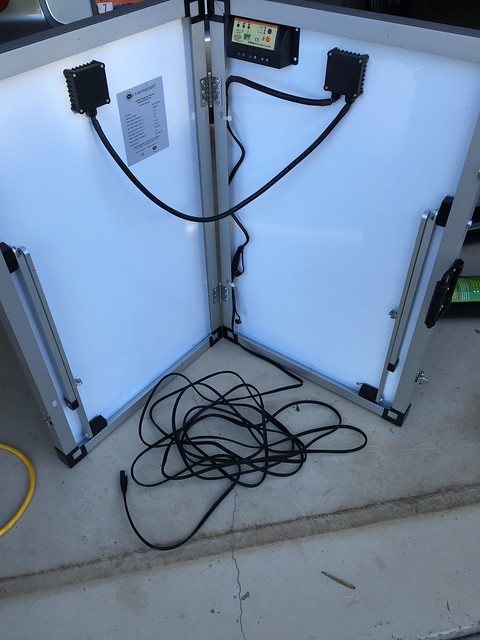
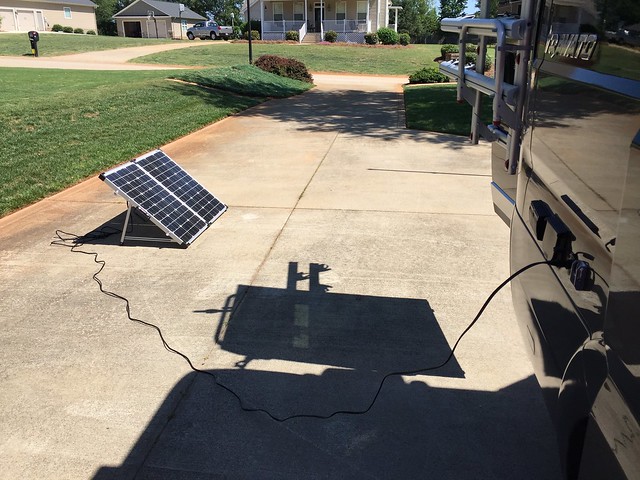
Another project I've had on the back burner was to re-wire my GoPower! 120 watt solar panel so I could plug it into the Zamp port on the side of the van.  This port is wired directly to the solar controller, so you can't have another controller in the mix.  The GoPower came with it's own controller wired in and mounted to the back of the panel.

So what I did was use some Zamp style cabling (actually, it's from Battery tender).   I simply got a pigtail and an extension cable from Amazon, disconnected the existing cable from the combiner to the controller and the long cable lead for the battery, and then connected my new cables to the combiner.   Here it is all done - around 15' or so of cable.   The Battery Tender cables are the same guage as what came with the panel.  The existing cable appeared thicker than it really was because they used a thicker insulation on it.   The actual copper is the same size.  The trickiest part of this is making sure you get the polarity right.  For Zamp, the covered part of the jack is positive.

Plugged in on a bright day around 2 pm, I was getting 5.5 amps.  Not too far off the max spec for this panel.


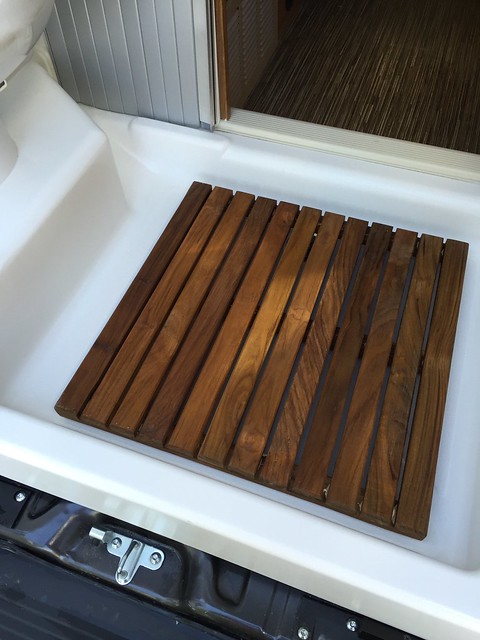
I also got a few accessories in anticipation of the B-13 rally in Rutherfordton, NC this weekend.  I saw this teak mat in a post on Facebook, so I chased it down on Amazon and ordered it.


Here is a link to it: House-Teak-Shower-Mat.  It really is solid teak and it comes coated with a oil finish.  You do need to add some rubber feat so it doesn't mar the shower pan or slip around.  I found some on the hardware aisle at Lowes.

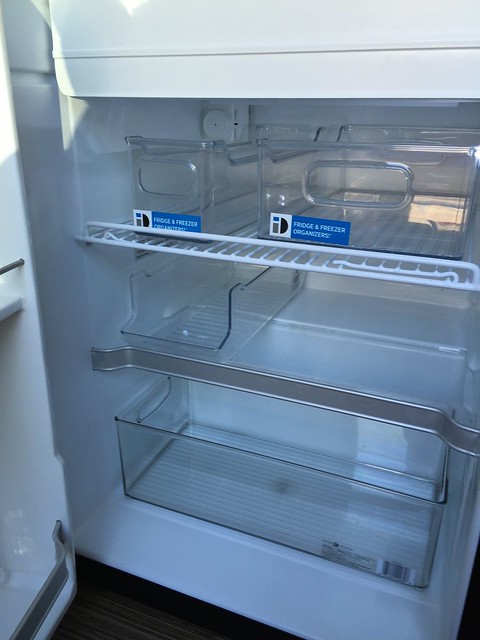
At Target, I got some more of those nice acrylic bins to put in the fridge.  One is sized for soda cans!  Think using some of these will mean less time on the knees searching thru the fridge.  These can act as drawers more or less.


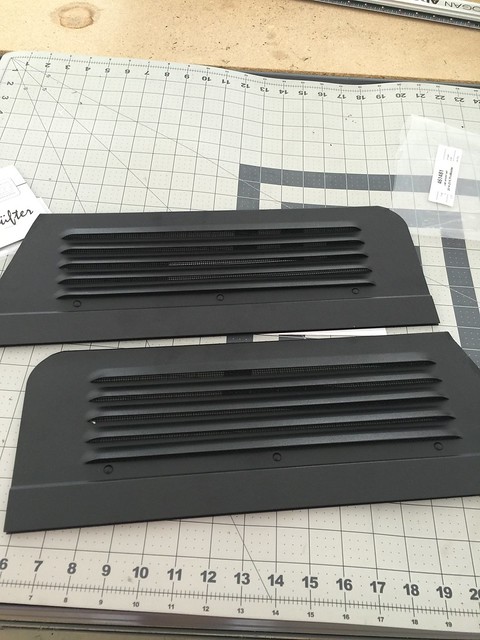
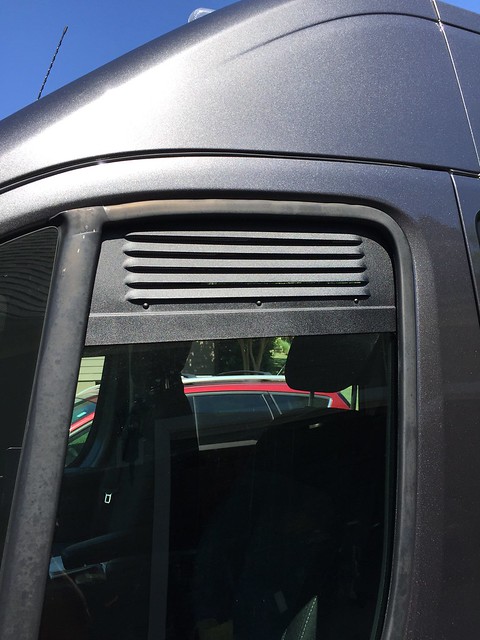
When Eurocampers.com got these vents in, I was quick to order: ProMaster Airvent Cab Window Inserts.  These go in your windows so you can leave the van locked up, but still get airflow.  Great in conjunction with the MaxxAir roof fan running.   They have integrated screens too to keep out the bugs.  They are made of a thin metal and appear well made and will last a long time.   They came in a clear envelope:


The edges are somewhat sharp, so you need to excercise caution handling and installing them.


They simply slide into the window track and you slowly roll up the window to secure them.


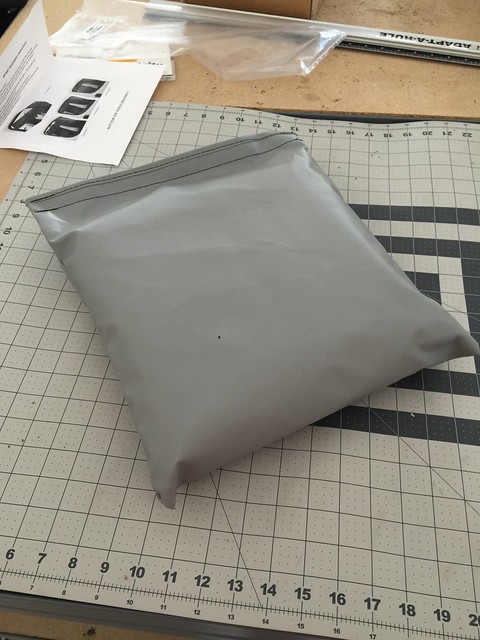
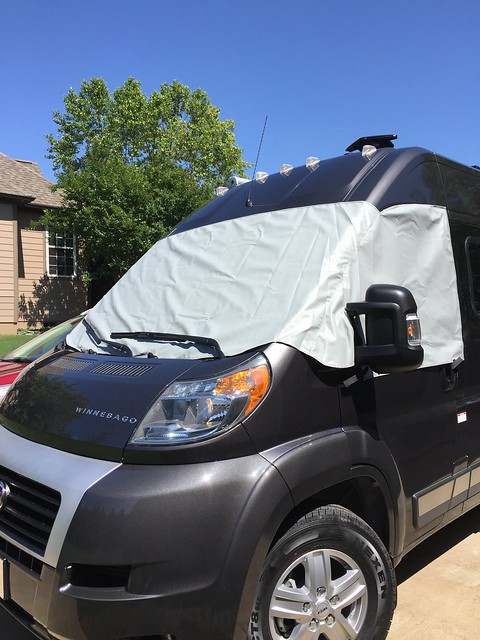
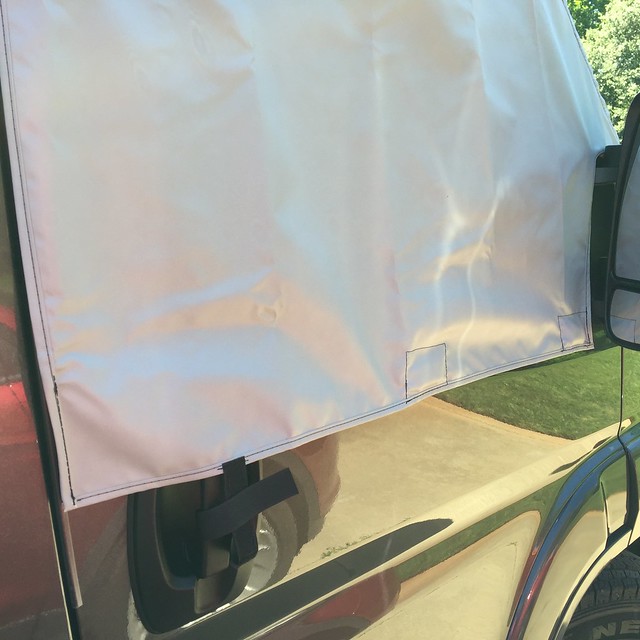
Another thing I wanted was an external window cover as an option in hot, sunny places.  You knock alot of heat down by not having the solar energy project thru the glass.  Again got this at Eurocampers.com:  Promaster Cab Window Cover.  Came in a really small storage pouch.


The ends slip over the corners of the driver and passenger doors and is held down with the wipers.  There are magnets to hold it against the body and velcro straps for the wirrors and the door handles.  After it heated up in the sun, it fits fairly snuggly - you can't open both doors at the same time.


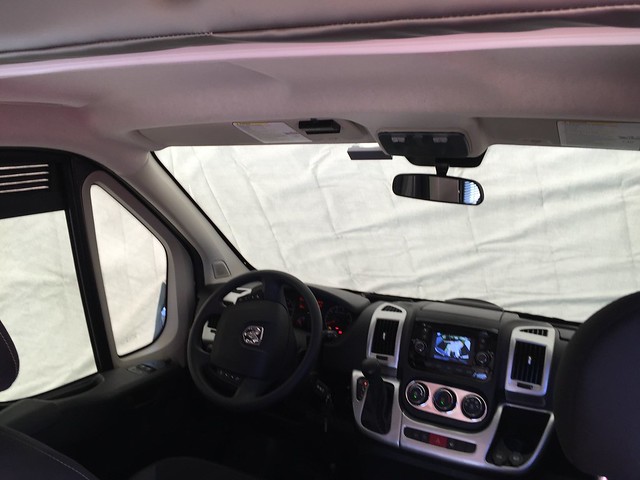
Even though it's heavy vinyl with a soft layer on the underside, you still get lots of light thru it - important in a small van.


Zamp Lithium Solar Controller

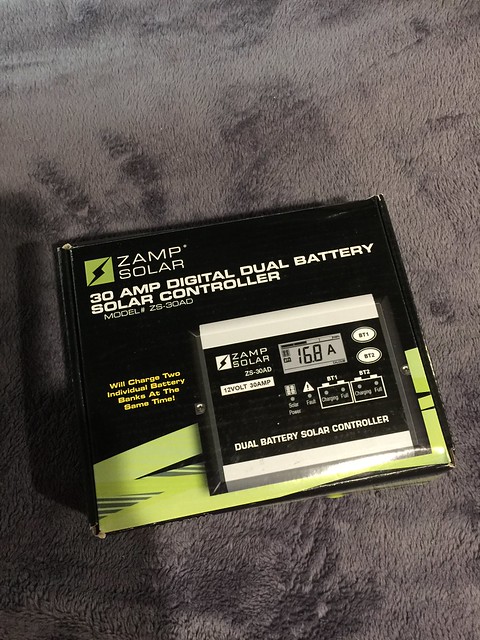
Well, I got my lithium specific solar controller last week in the mail, but i didn't get it installed as I was busy attending Miatas in May rally.   As my regular readers know, I switched the house batteries in my Travato to the Stark Lithium Batteries (LiFePO4) and my Converter/Charger to a Progressive Dynamics Lithium Model.   The last step in this project was to get a new solar controller that would have the LiFePO4 profile built in.  What this means is a profile of constant voltage charging at 14.6 volts.    Zamp finally came out with their unit recently and I got this one at Solardealz.com for $190 (I know, way overpriced!).

So far, I think it's the only one of this type on the market (at least that I know about).  It's exactly the same dimensionally as my "regular" controller, and came in this small box:


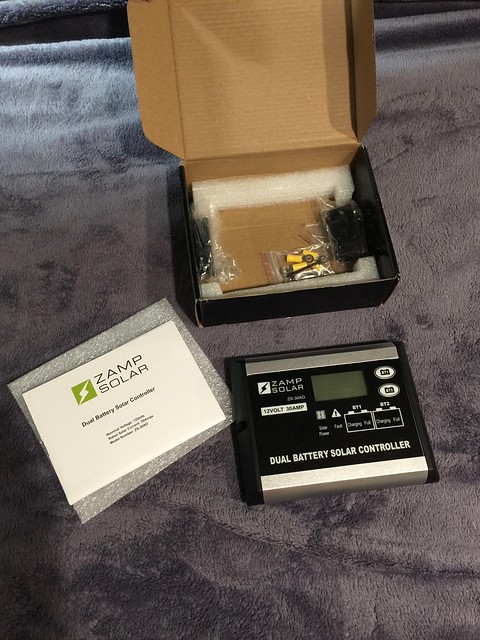
Unpacked.  Comes with screws and some wiring shields, the instruction booklet and some padding.


Looks very similar, but a few differences.  The new controller not only has extra battery types built in, but it also is two controllers in one - you can attach two batteries or battery banks and have them have separate profiles.  Could be handy as we'll discuss later.


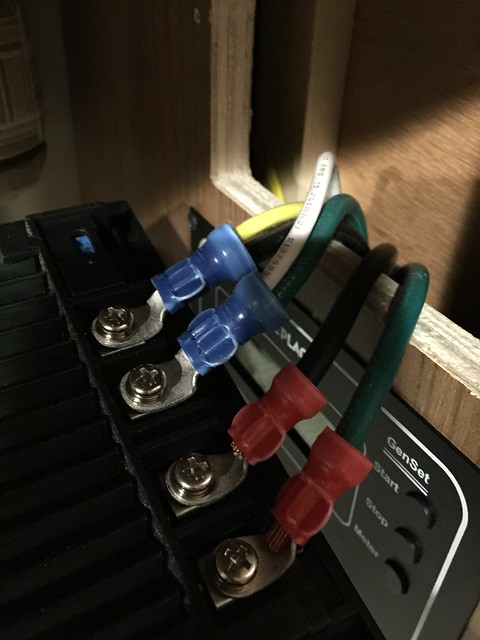
This was the wiring once you unscrew the existing controller from the wall.  It's all heavy guage, which was a nice surprise.   What I was hoping for though, was 2 pairs of wires from the batteries (my van has 2). They must fuse down the line and then split off to each battery.  In the picture below, you see there are 4 ports on this controller - pos & neg from the solar panels, and pos (+) & neg (-) to the batteries.  Pretty simple (the ports for the temp sensor and the remote display are unused).


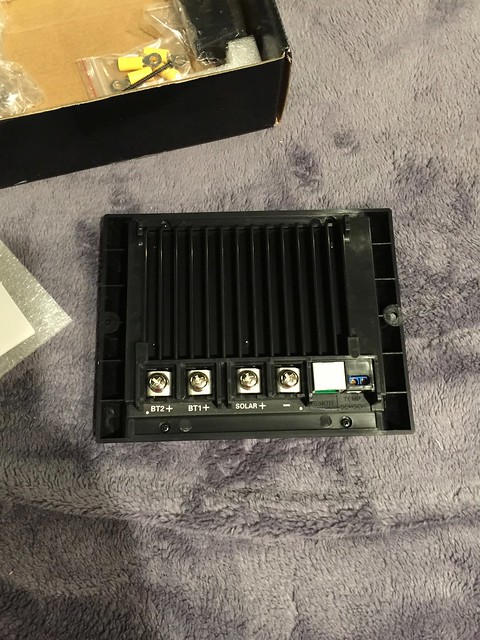
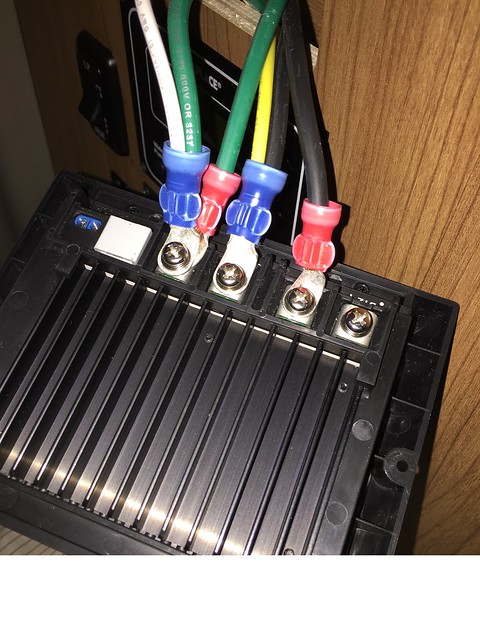
Here is the back of the new controller.  It also has 4 ports, but they are a bit different.   One is a common ground (neg), the others are pos from solar panels, pos for Battery 1 and pos for Battery 2.


So initially, I connected what I had - both ground wires, the pos for the solar panels, and the pos for the battery bank.   I left Battery 2 pos port unused.  Also unused is the temp sensor and remote display port.

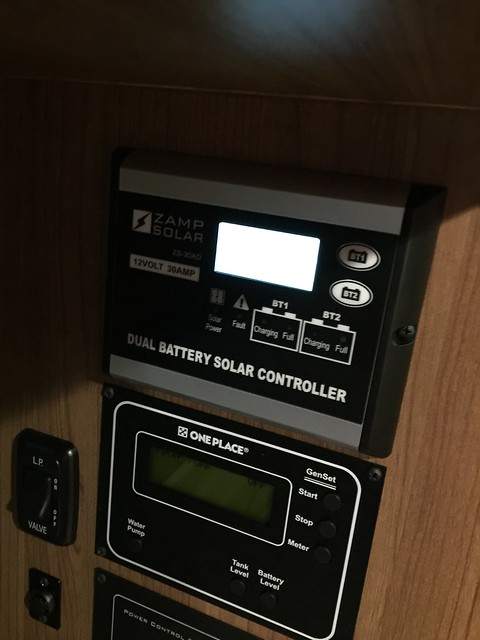
All buttoned up, it lit right up and looked like it was operating normally.


On the right side of the controller, you can see two buttons - one for Battery 1 and one for Battery 2.  That's all there is.  You hold each button down to program the battery type and the proportion of charging.    If you simply push each button, you can toggle thru all the battery status features.

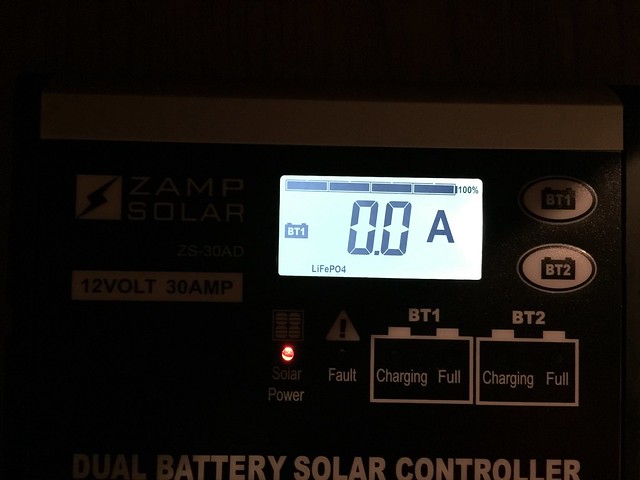
Below you see the present current.  Since we are in my garage, there was 0 amps from the panels.


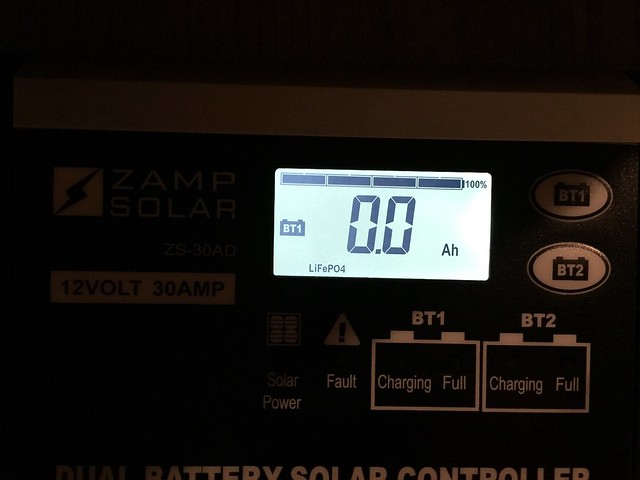
Press again and you see the accumulated amp hours for the day.   Along the top is a bar showing the state of charge - I believe it calculates this based on battery voltage.  Also, there are LED's on the front face of the controller to show:  solar active, fault, Battery 1 charging & full, Battery 2 charging & full.


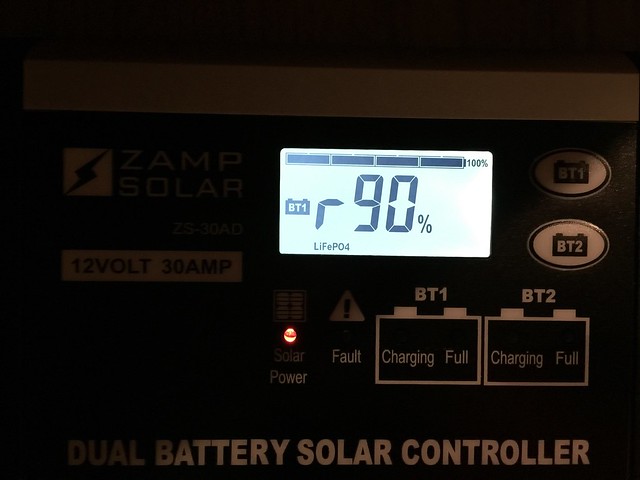
Press again and you see the proportion of charge.  I had this set for 90% of the energy to go to Battery 1.  The instructions say that if no second battery is connected, or is fully charged, then all the energy would go to Battery 1, making this setting unnecessary.


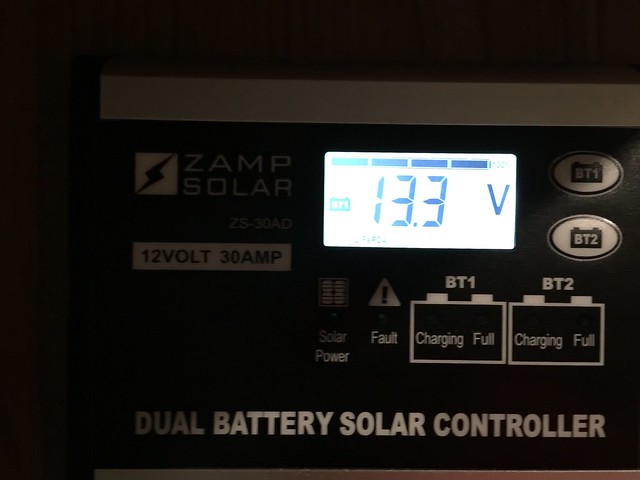
Press again and you get the current voltage.  Looks great, lets go out in the sun and get some charging going!


That's where things went haywire.  It charged Battery 1 just fine.  No issue there.  But it also lit up the fault light, and showed the error code for Battery 2 disconnected or no voltage.   According to the instructions, it was supposed to just sense there was no battery 2 and disconnect it.  But alas, it doesn't work that way.   I thought about what to do - perhaps I could install a jumper to join Battery 1 and Battery 2.   Didn't think that would work.  What else to do?   How about running a cable to charge the engine battery?  Brilliant!

So this makes the project a bit bigger and requires not only unscrewing the controller, but also both bed decks and ordering some parts.   What I got was a couple of pigtails and an extension cable from Battery Tender (just search on Amazon).  It's the same wiring setup as Zamp uses - they use the same connector parts.  Since I use the Battery Tender Jr already wired to the engine battery, I thought this would be a piece of cake.

Here is the pigtail wired to the controller.


I just added the neg to the common ground port, and the pos to Battery 2 port.


I used a wire coat hanger to fish the cable thru the edge of the shower pan from under one bed to the other.  Then I ran the cable thru the street-side bed and behind the kitchen cabinet.   Thankfully I had a screw gun - I don't recommend trying to do all these screws by hand.

It came out behind the driver's seat and met up perfectly with the pigtail I had for the Battery Tender Jr attached to the engine battery under the driver's footwell.


I thought I was quite clever!  Plugged it in, heard a pop and nothing on the controller's display.  Still the error code of no Battery 2.   Checked the in-line fuse on the pigtail.  It was burned up.  Put in another and pop! Same thing happened.  Replaced it again and the same result!  Was the wire bad?  Were my connections at the controller wrong?   I've been charging with the Battery Tender for months, so the wiring on the engine battery must be good.   So in checking the cabling, it struck me - by using these specific cables, the pos and neg get reversed when you have pigtails at both ends.   So to fix, I got another pigtail and just reversed the polarity at the battery.  So now I have one pigtail for the Battery Tender Jr, and another marked solar for connecting to my new lithium controller (Battery 2 is now set to AGM).
Buttoned back up again, everything is working perfectly and no error messages.  I have 90% of my solar going to the house batteries, and 10% going to the engine battery.  Unless of course either is fully charged and all energy goes to the remaining battery.