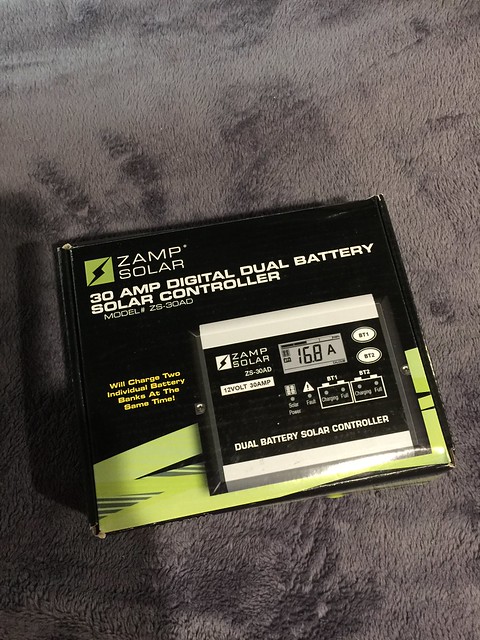
Well, I got my lithium specific solar controller last week in the mail, but i didn't get it installed as I was busy attending Miatas in May rally. As my regular readers know, I switched the house batteries in my Travato to the Stark Lithium Batteries (LiFePO4) and my Converter/Charger to a Progressive Dynamics Lithium Model. The last step in this project was to get a new solar controller that would have the LiFePO4 profile built in. What this means is a profile of constant voltage charging at 14.6 volts. Zamp finally came out with their unit recently and I got this one at Solardealz.com for $190 (I know, way overpriced!).
So far, I think it's the only one of this type on the market (at least that I know about). It's exactly the same dimensionally as my "regular" controller, and came in this small box:
Unpacked. Comes with screws and some wiring shields, the instruction booklet and some padding.
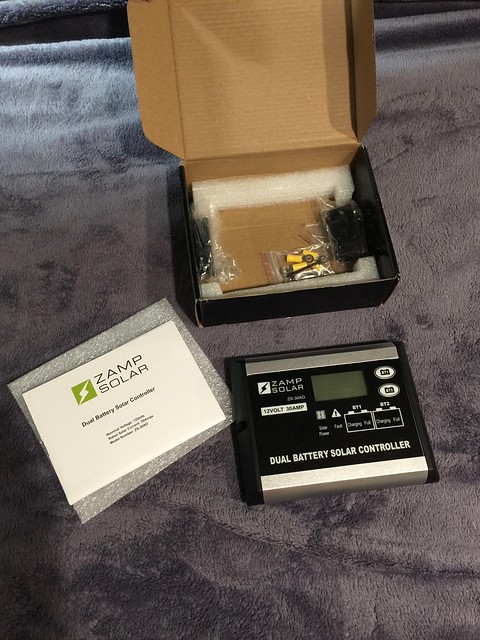
Looks very similar, but a few differences. The new controller not only has extra battery types built in, but it also is two controllers in one - you can attach two batteries or battery banks and have them have separate profiles. Could be handy as we'll discuss later.

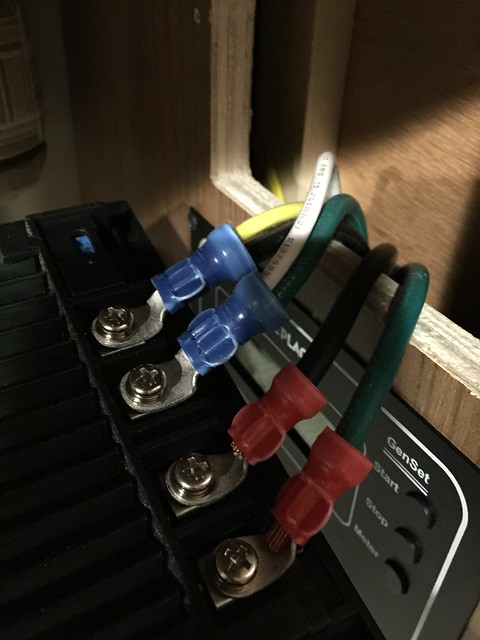
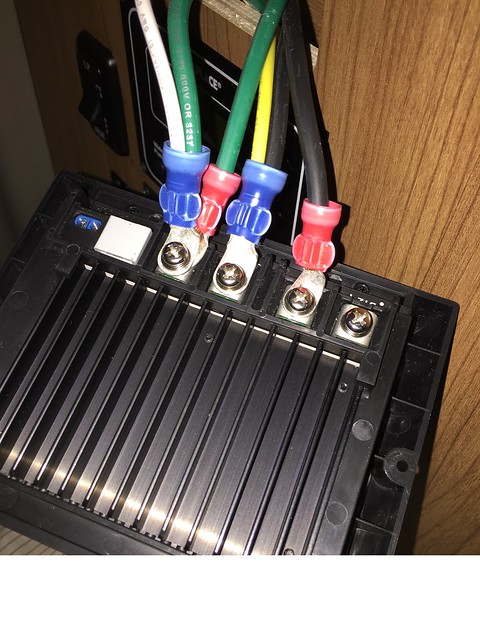
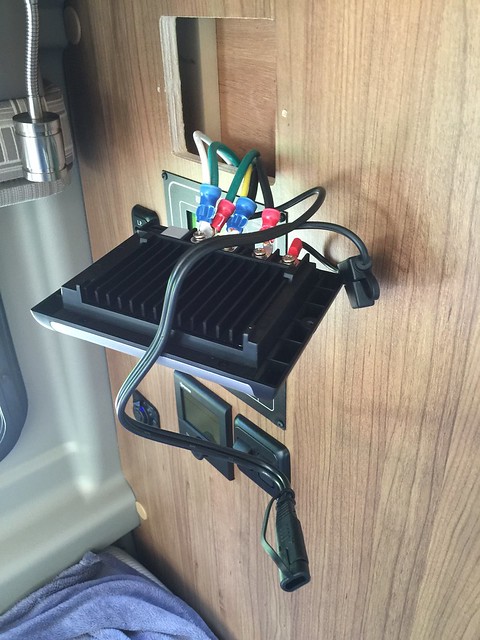
This was the wiring once you unscrew the existing controller from the wall. It's all heavy guage, which was a nice surprise. What I was hoping for though, was 2 pairs of wires from the batteries (my van has 2). They must fuse down the line and then split off to each battery. In the picture below, you see there are 4 ports on this controller - pos & neg from the solar panels, and pos (+) & neg (-) to the batteries. Pretty simple (the ports for the temp sensor and the remote display are unused).
Here is the back of the new controller. It also has 4 ports, but they are a bit different. One is a common ground (neg), the others are pos from solar panels, pos for Battery 1 and pos for Battery 2.
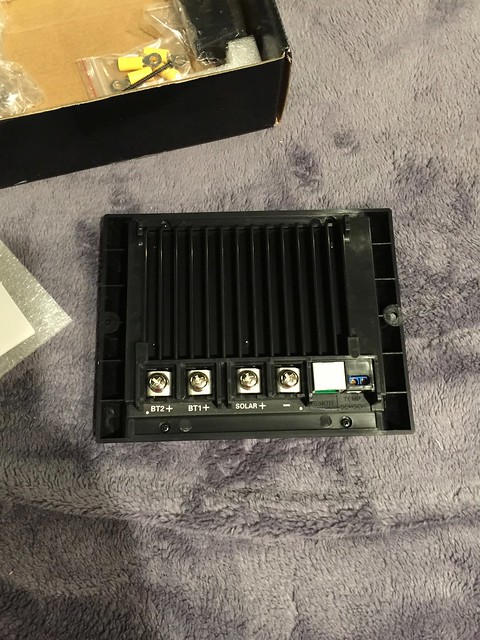
So initially, I connected what I had - both ground wires, the pos for the solar panels, and the pos for the battery bank. I left Battery 2 pos port unused. Also unused is the temp sensor and remote display port.
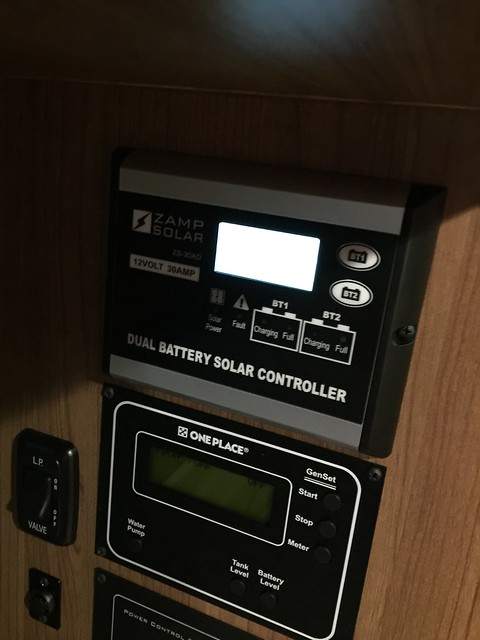
All buttoned up, it lit right up and looked like it was operating normally.
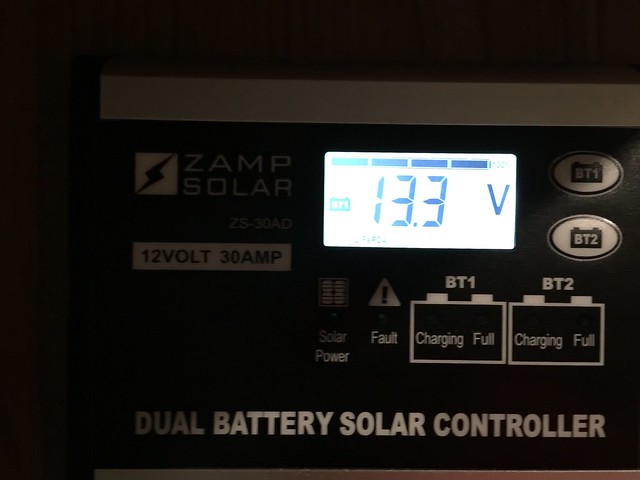
On the right side of the controller, you can see two buttons - one for Battery 1 and one for Battery 2. That's all there is. You hold each button down to program the battery type and the proportion of charging. If you simply push each button, you can toggle thru all the battery status features.
Below you see the present current. Since we are in my garage, there was 0 amps from the panels.
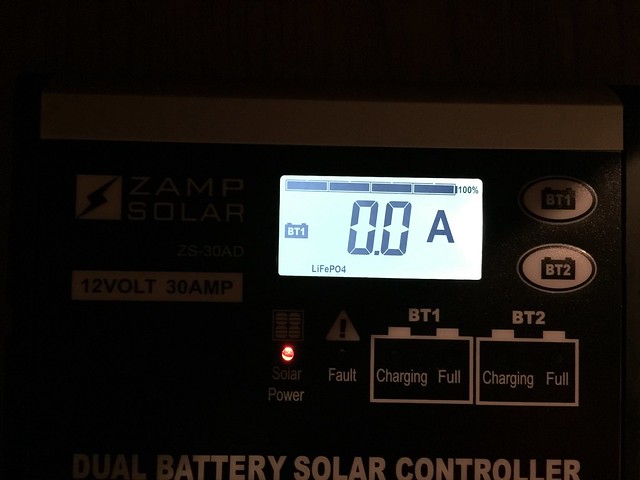
Press again and you see the accumulated amp hours for the day. Along the top is a bar showing the state of charge - I believe it calculates this based on battery voltage. Also, there are LED's on the front face of the controller to show: solar active, fault, Battery 1 charging & full, Battery 2 charging & full.

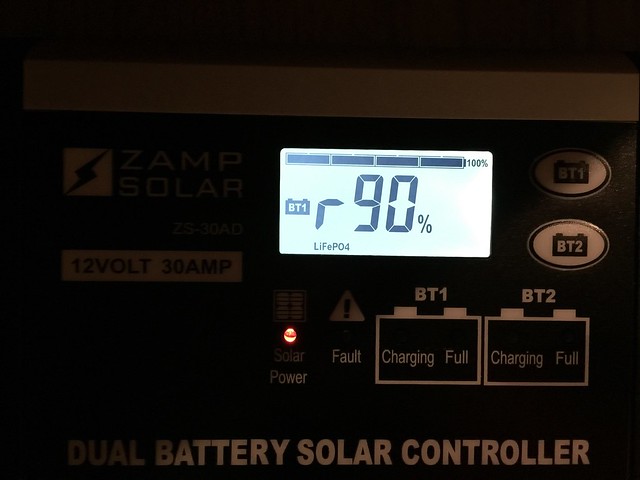
Press again and you see the proportion of charge. I had this set for 90% of the energy to go to Battery 1. The instructions say that if no second battery is connected, or is fully charged, then all the energy would go to Battery 1, making this setting unnecessary.
Press again and you get the current voltage. Looks great, lets go out in the sun and get some charging going!
That's where things went haywire. It charged Battery 1 just fine. No issue there. But it also lit up the fault light, and showed the error code for Battery 2 disconnected or no voltage. According to the instructions, it was supposed to just sense there was no battery 2 and disconnect it. But alas, it doesn't work that way. I thought about what to do - perhaps I could install a jumper to join Battery 1 and Battery 2. Didn't think that would work. What else to do? How about running a cable to charge the engine battery? Brilliant!
So this makes the project a bit bigger and requires not only unscrewing the controller, but also both bed decks and ordering some parts. What I got was a couple of pigtails and an extension cable from Battery Tender (just search on Amazon). It's the same wiring setup as Zamp uses - they use the same connector parts. Since I use the Battery Tender Jr already wired to the engine battery, I thought this would be a piece of cake.
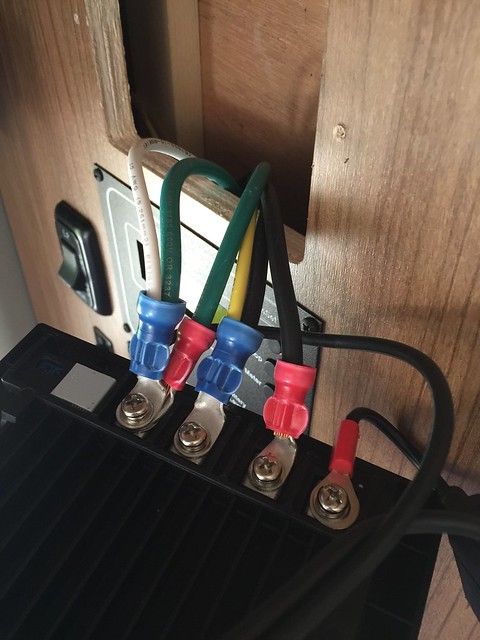
Here is the pigtail wired to the controller.
I just added the neg to the common ground port, and the pos to Battery 2 port.
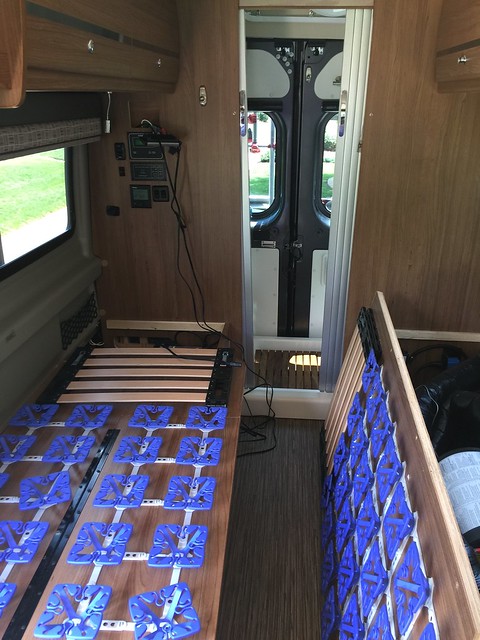
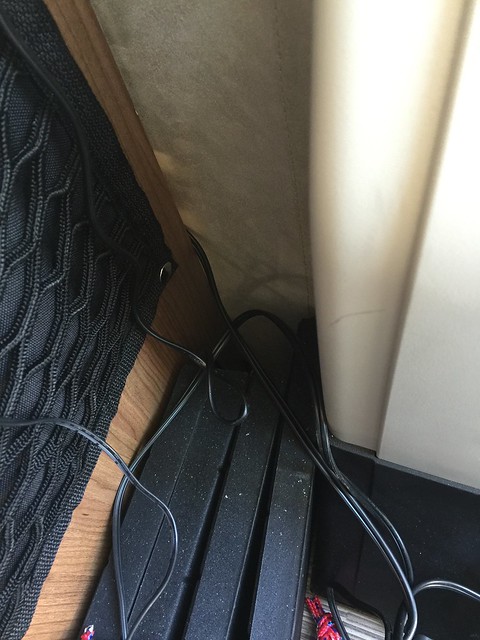
I used a wire coat hanger to fish the cable thru the edge of the shower pan from under one bed to the other. Then I ran the cable thru the street-side bed and behind the kitchen cabinet. Thankfully I had a screw gun - I don't recommend trying to do all these screws by hand.
It came out behind the driver's seat and met up perfectly with the pigtail I had for the Battery Tender Jr attached to the engine battery under the driver's footwell.
I thought I was quite clever! Plugged it in, heard a pop and nothing on the controller's display. Still the error code of no Battery 2. Checked the in-line fuse on the pigtail. It was burned up. Put in another and pop! Same thing happened. Replaced it again and the same result! Was the wire bad? Were my connections at the controller wrong? I've been charging with the Battery Tender for months, so the wiring on the engine battery must be good. So in checking the cabling, it struck me - by using these specific cables, the pos and neg get reversed when you have pigtails at both ends. So to fix, I got another pigtail and just reversed the polarity at the battery. So now I have one pigtail for the Battery Tender Jr, and another marked solar for connecting to my new lithium controller (Battery 2 is now set to AGM).
Buttoned back up again, everything is working perfectly and no error messages. I have 90% of my solar going to the house batteries, and 10% going to the engine battery. Unless of course either is fully charged and all energy goes to the remaining battery.
Awesome!
ReplyDeleteHow do you like this new charger versus old one? Was the old one fine to charge the drop-in StarkPower batteries?
ReplyDeleteI have a Winnebago View which has 2 deep cycle group 24 batteries, so 160Ah total (80Ah usable) and would like to swap them with 2x100Ah Stark ones. If the original ZampSolar charge controller works fine (AGM setting I would imagine?) I'll just have to change the charger? Thanks!
If you go with Lithium batteries, you have to swap out your solar controller AND your converter/charger. What these do is shut off charging when the batteries are full - you don't trickle lithiums or you will wreck them.
ReplyDeleteThanks! What about the alternator? It keeps charging the batteries too while the engine is on, right? Do you have a switch for it?
Delete