Wednesday, May 18, 2016

Exhaust Resonator, Rewiring a Portable Solar Panel & a Few Accessories for the Travato

Getting this resonator installed was a long time in coming.  I bought it in 2014 for my original Travato!   So I had a local shop put it on for me.   They do oil changes and muffler work - mostly exhaust pipes on collector and classic muscle cars.   To my surprise they said they'd be glad to do it.

Others have reported that their shops would work on this type of thing out in the parking lot.  I assume they would remove the pipe and bring it inside to weld on the resonator and then bring it out and bolt it on.  Well, my guy wasn't going to work that way - he wanted the van inside the shop and on the lift!   I almost backed out of doing this, as it was extremely tight getting her in thru the door and onto those skinny tracks on the lift.   He was able to raise it about 4-5 feet off the deck, but there were no inches to spare between the ceiling and my air conditioner.

But it did make the work much easier, and thus quicker.  He cut off the pipe with it still attached to the generator.  Welded the resonator in place.    He did cut the downpipe I brought in and welded that to the resonator first.    I wanted the downturn to try to knock down alittle more of the noise.

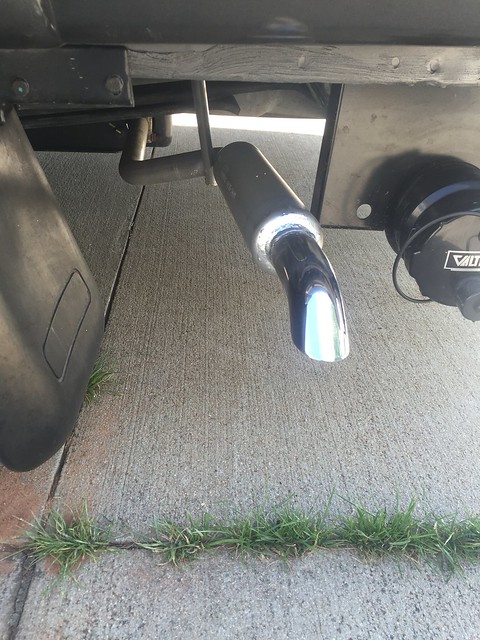
We also welded on a new modern type hanger.  He bent it around the tailpipe to give it more support and also because the tail pipe was a very thin metal.  Here it is all installed - took about 45 minutes.


He painted on some cold galvanizing to cover the new welds.   Checking underneath, I see no evidence of all the sparks flying.  I was quite concerned about the waste tanks and wiring under there, but they appear unscathed.   It all seems very secure, but there is still some give in the pipe for the vibration.  The hanger has a rubber connection to the van's body.


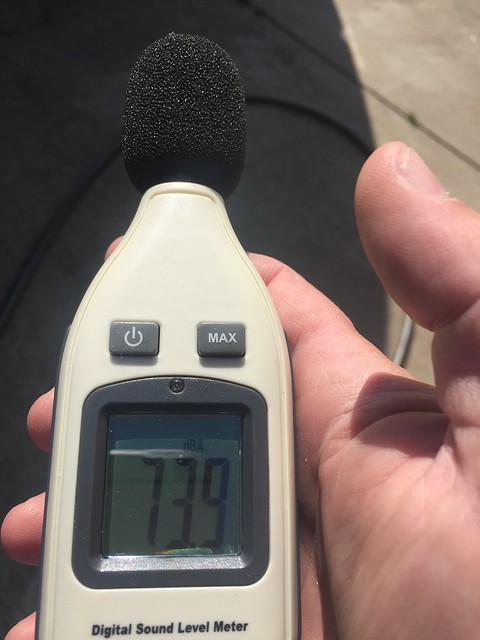
With my handy dB meter, at around ten feet, I'm reading 74.   Not a great deal lower than what I measured back in 2014 (see my post on that test).  Inside the cabin, it was considerably less noisy - 60 dB.   The biggest difference is in tone.  It's alot less harsh of a sound.  Much lower tone.   


Not only am I happy with it, but it was cheap!  That's the kind of bonus I like.


Another project I've had on the back burner was to re-wire my GoPower! 120 watt solar panel so I could plug it into the Zamp port on the side of the van.  This port is wired directly to the solar controller, so you can't have another controller in the mix.  The GoPower came with it's own controller wired in and mounted to the back of the panel.

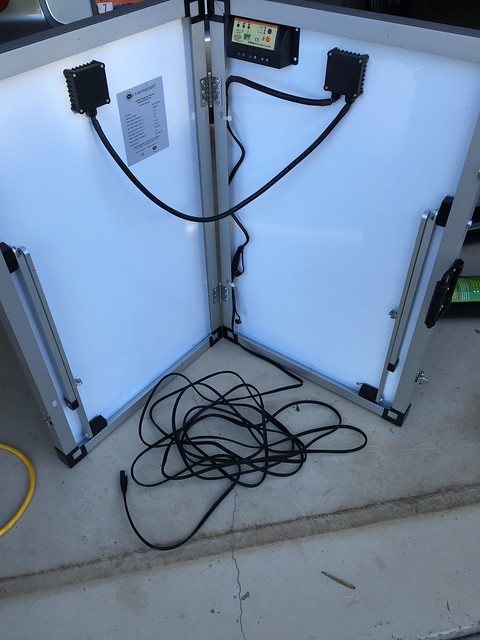
So what I did was use some Zamp style cabling (actually, it's from Battery tender).   I simply got a pigtail and an extension cable from Amazon, disconnected the existing cable from the combiner to the controller and the long cable lead for the battery, and then connected my new cables to the combiner.   Here it is all done - around 15' or so of cable.   The Battery Tender cables are the same guage as what came with the panel.  The existing cable appeared thicker than it really was because they used a thicker insulation on it.   The actual copper is the same size.  The trickiest part of this is making sure you get the polarity right.  For Zamp, the covered part of the jack is positive.

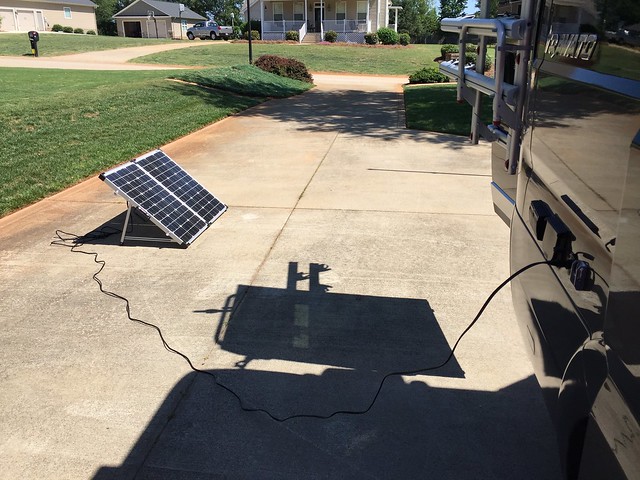
Plugged in on a bright day around 2 pm, I was getting 5.5 amps.  Not too far off the max spec for this panel.


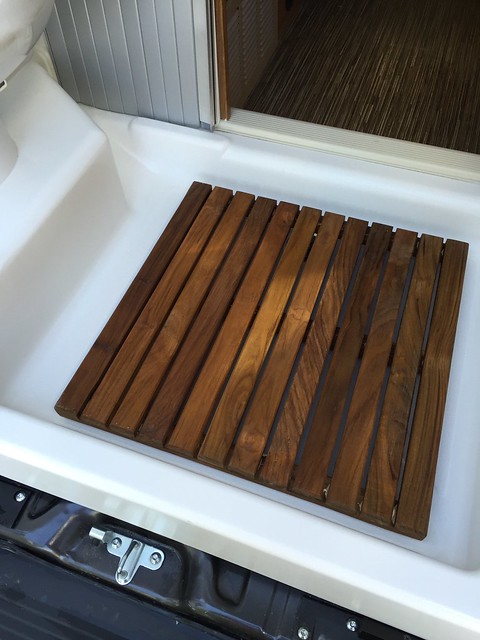
I also got a few accessories in anticipation of the B-13 rally in Rutherfordton, NC this weekend.  I saw this teak mat in a post on Facebook, so I chased it down on Amazon and ordered it.


Here is a link to it: House-Teak-Shower-Mat.  It really is solid teak and it comes coated with a oil finish.  You do need to add some rubber feat so it doesn't mar the shower pan or slip around.  I found some on the hardware aisle at Lowes.

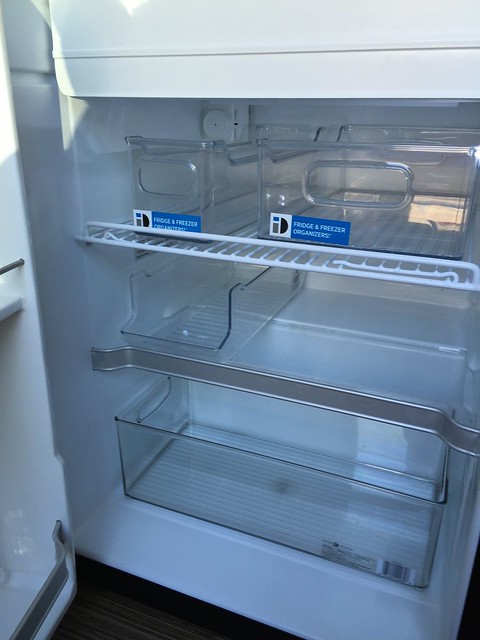
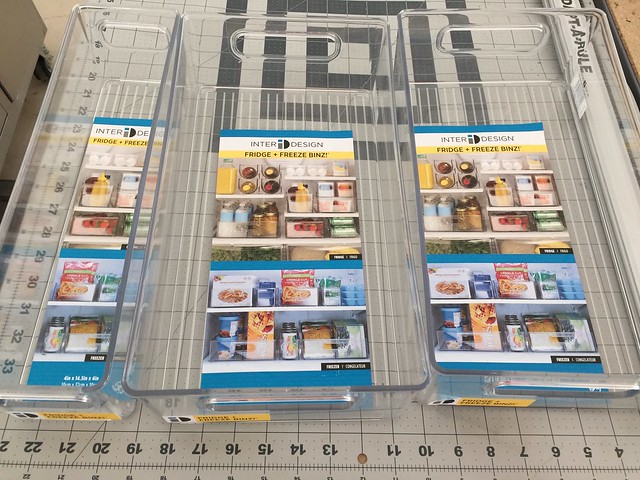
At Target, I got some more of those nice acrylic bins to put in the fridge.  One is sized for soda cans!  Think using some of these will mean less time on the knees searching thru the fridge.  These can act as drawers more or less.


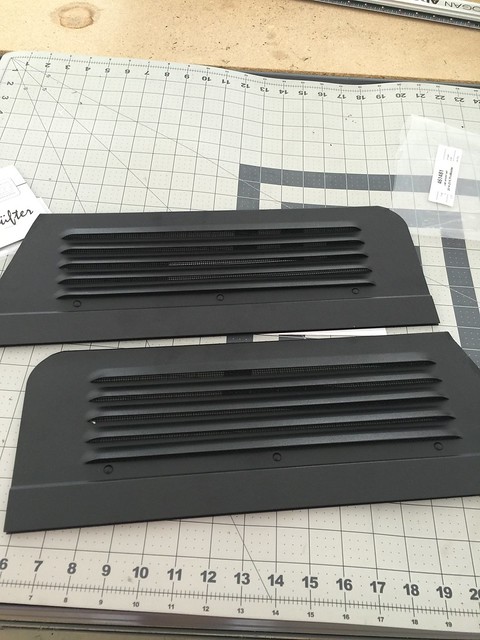
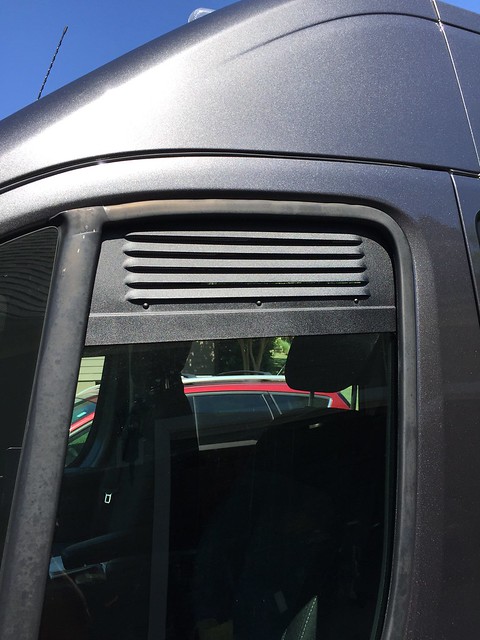
When Eurocampers.com got these vents in, I was quick to order: ProMaster Airvent Cab Window Inserts.  These go in your windows so you can leave the van locked up, but still get airflow.  Great in conjunction with the MaxxAir roof fan running.   They have integrated screens too to keep out the bugs.  They are made of a thin metal and appear well made and will last a long time.   They came in a clear envelope:


The edges are somewhat sharp, so you need to excercise caution handling and installing them.


They simply slide into the window track and you slowly roll up the window to secure them.


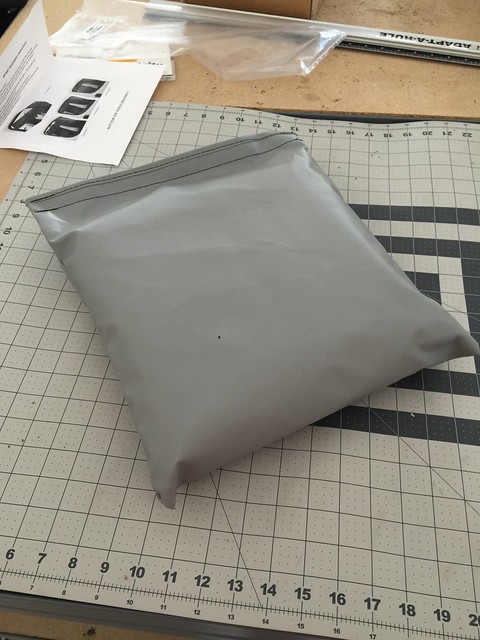
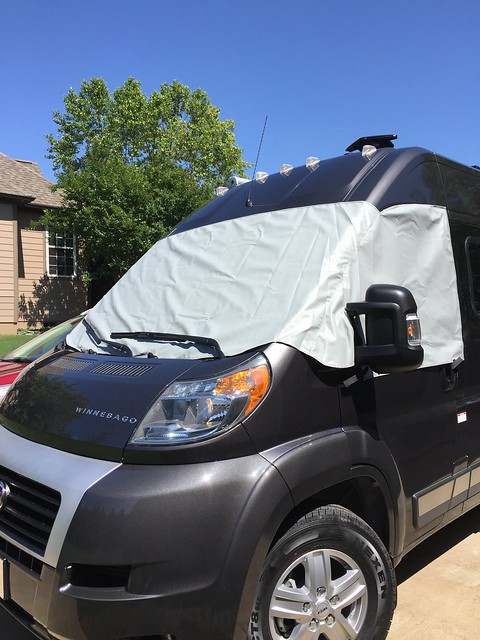
Another thing I wanted was an external window cover as an option in hot, sunny places.  You knock alot of heat down by not having the solar energy project thru the glass.  Again got this at Eurocampers.com:  Promaster Cab Window Cover.  Came in a really small storage pouch.


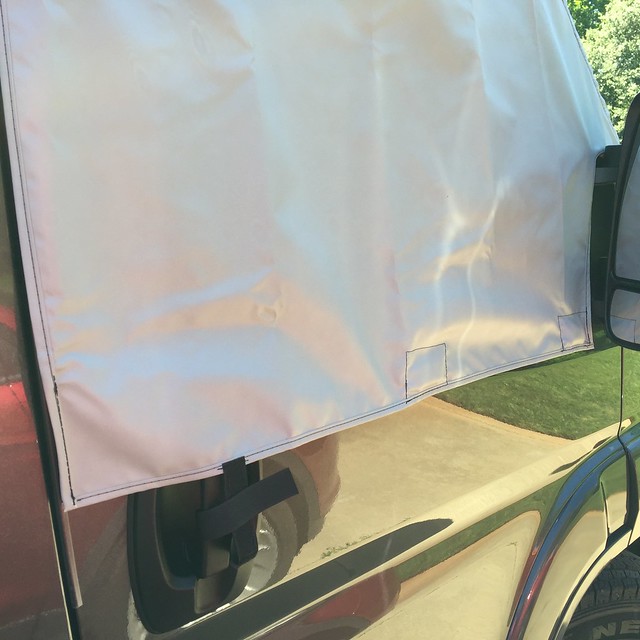
The ends slip over the corners of the driver and passenger doors and is held down with the wipers.  There are magnets to hold it against the body and velcro straps for the wirrors and the door handles.  After it heated up in the sun, it fits fairly snuggly - you can't open both doors at the same time.


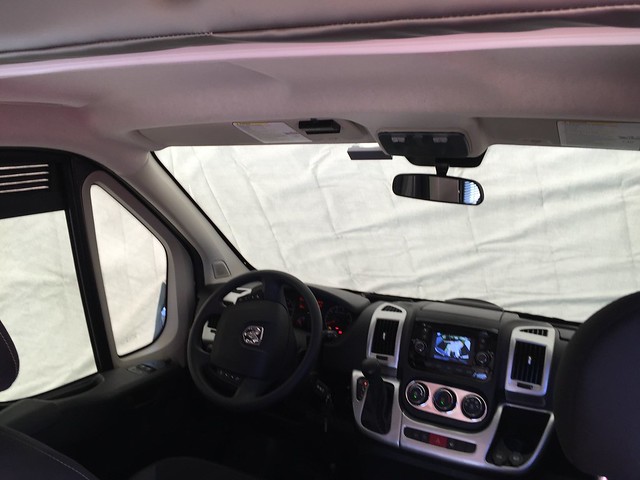
Even though it's heavy vinyl with a soft layer on the underside, you still get lots of light thru it - important in a small van.

Zamp Lithium Solar Controller

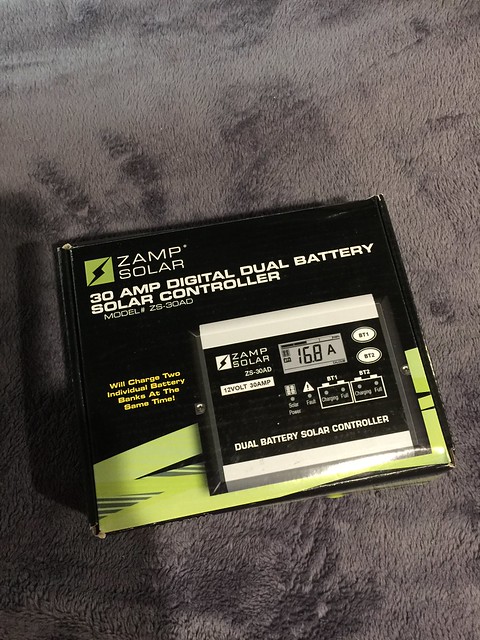
Well, I got my lithium specific solar controller last week in the mail, but i didn't get it installed as I was busy attending Miatas in May rally.   As my regular readers know, I switched the house batteries in my Travato to the Stark Lithium Batteries (LiFePO4) and my Converter/Charger to a Progressive Dynamics Lithium Model.   The last step in this project was to get a new solar controller that would have the LiFePO4 profile built in.  What this means is a profile of constant voltage charging at 14.6 volts.    Zamp finally came out with their unit recently and I got this one at Solardealz.com for $190 (I know, way overpriced!).

So far, I think it's the only one of this type on the market (at least that I know about).  It's exactly the same dimensionally as my "regular" controller, and came in this small box:


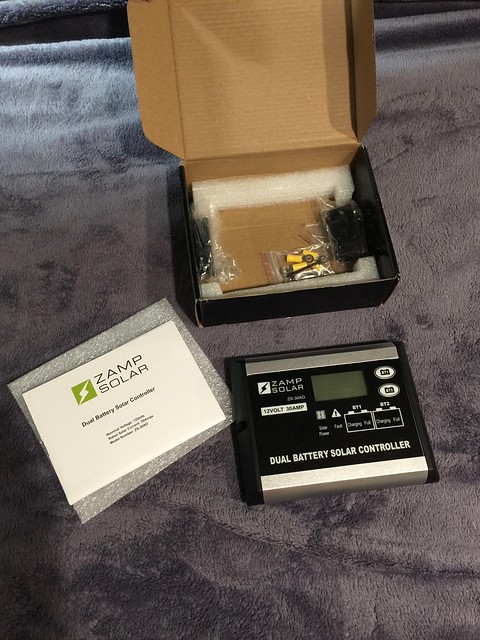
Unpacked.  Comes with screws and some wiring shields, the instruction booklet and some padding.


Looks very similar, but a few differences.  The new controller not only has extra battery types built in, but it also is two controllers in one - you can attach two batteries or battery banks and have them have separate profiles.  Could be handy as we'll discuss later.


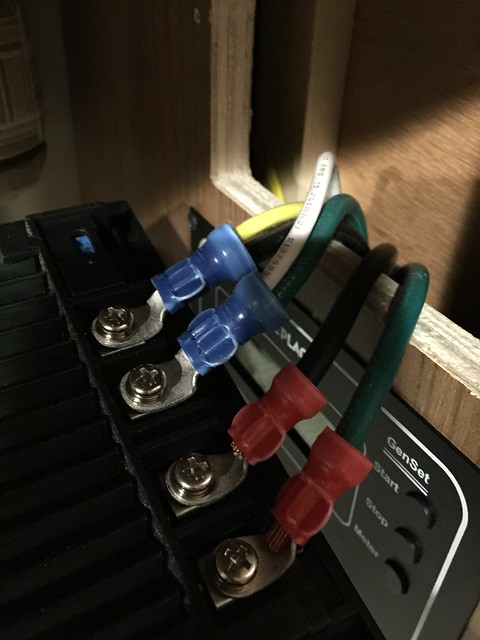
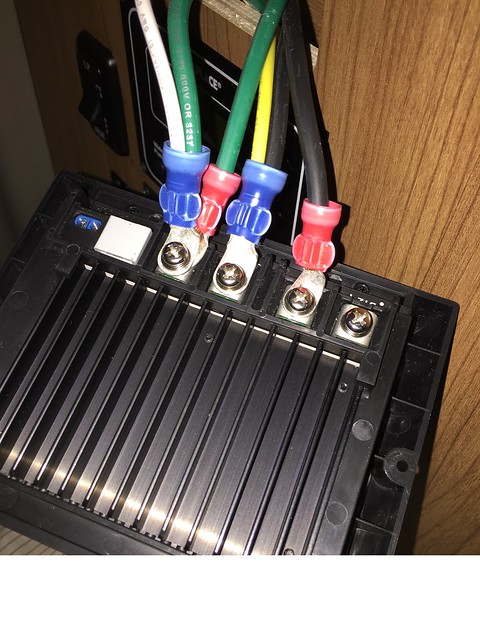
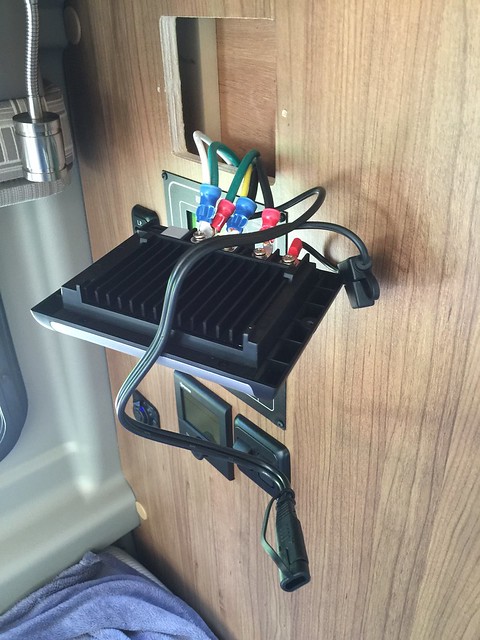
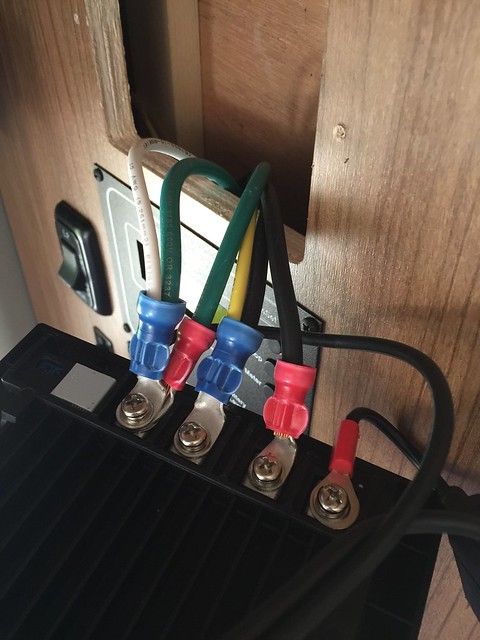
This was the wiring once you unscrew the existing controller from the wall.  It's all heavy guage, which was a nice surprise.   What I was hoping for though, was 2 pairs of wires from the batteries (my van has 2). They must fuse down the line and then split off to each battery.  In the picture below, you see there are 4 ports on this controller - pos & neg from the solar panels, and pos (+) & neg (-) to the batteries.  Pretty simple (the ports for the temp sensor and the remote display are unused).


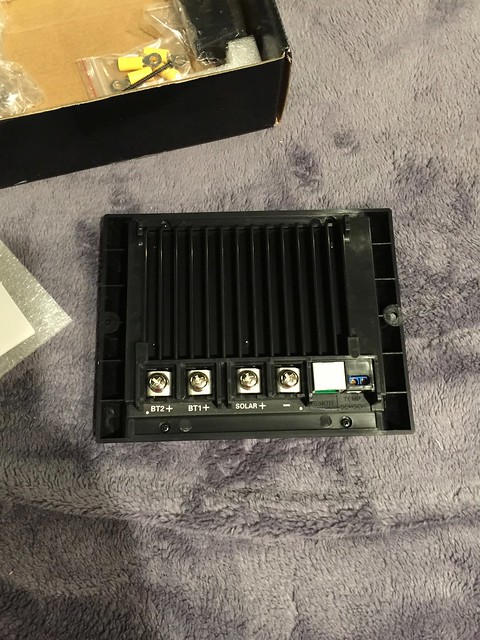
Here is the back of the new controller.  It also has 4 ports, but they are a bit different.   One is a common ground (neg), the others are pos from solar panels, pos for Battery 1 and pos for Battery 2.


So initially, I connected what I had - both ground wires, the pos for the solar panels, and the pos for the battery bank.   I left Battery 2 pos port unused.  Also unused is the temp sensor and remote display port.

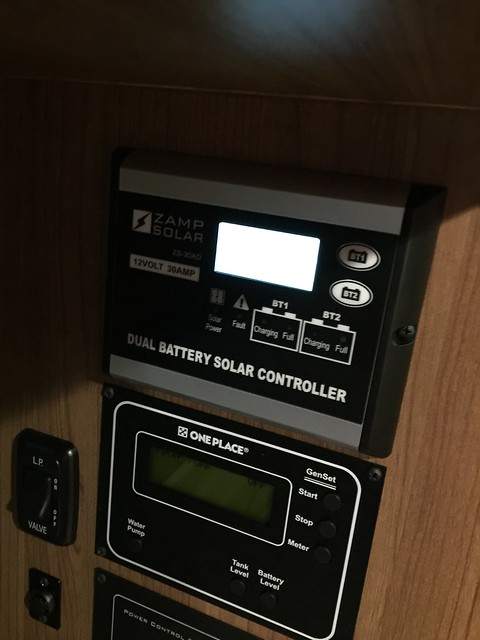
All buttoned up, it lit right up and looked like it was operating normally.


On the right side of the controller, you can see two buttons - one for Battery 1 and one for Battery 2.  That's all there is.  You hold each button down to program the battery type and the proportion of charging.    If you simply push each button, you can toggle thru all the battery status features.

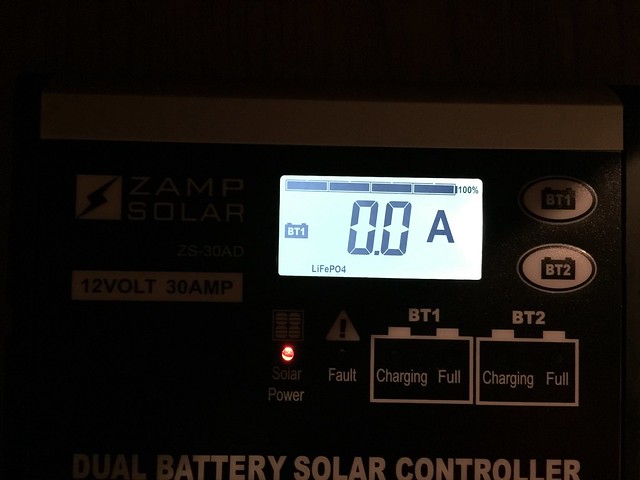
Below you see the present current.  Since we are in my garage, there was 0 amps from the panels.


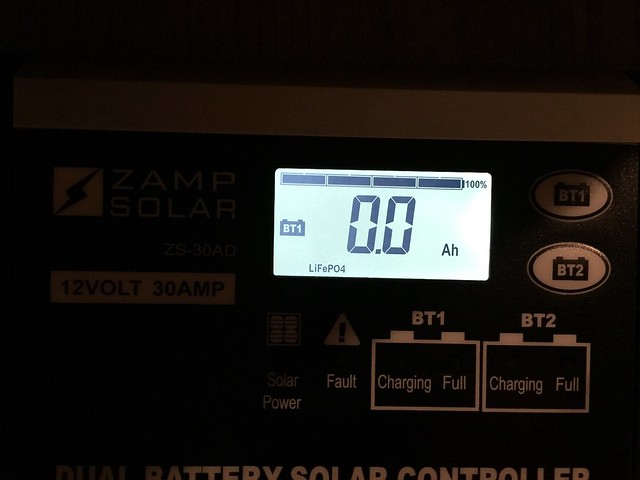
Press again and you see the accumulated amp hours for the day.   Along the top is a bar showing the state of charge - I believe it calculates this based on battery voltage.  Also, there are LED's on the front face of the controller to show:  solar active, fault, Battery 1 charging & full, Battery 2 charging & full.


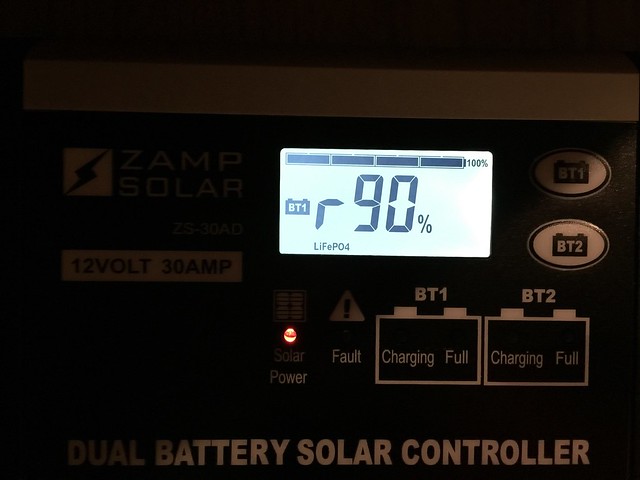
Press again and you see the proportion of charge.  I had this set for 90% of the energy to go to Battery 1.  The instructions say that if no second battery is connected, or is fully charged, then all the energy would go to Battery 1, making this setting unnecessary.


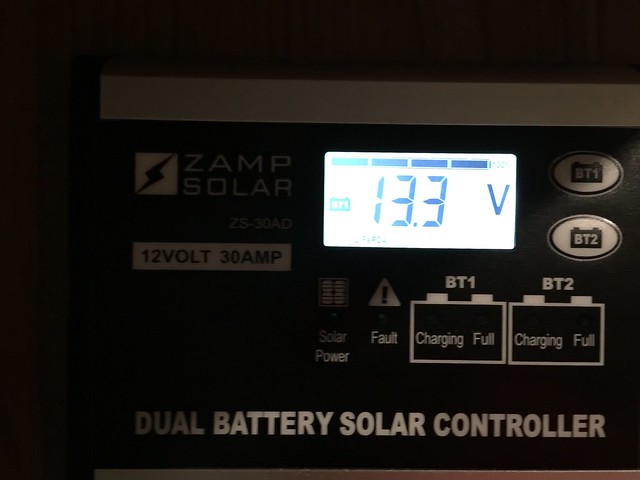
Press again and you get the current voltage.  Looks great, lets go out in the sun and get some charging going!


That's where things went haywire.  It charged Battery 1 just fine.  No issue there.  But it also lit up the fault light, and showed the error code for Battery 2 disconnected or no voltage.   According to the instructions, it was supposed to just sense there was no battery 2 and disconnect it.  But alas, it doesn't work that way.   I thought about what to do - perhaps I could install a jumper to join Battery 1 and Battery 2.   Didn't think that would work.  What else to do?   How about running a cable to charge the engine battery?  Brilliant!

So this makes the project a bit bigger and requires not only unscrewing the controller, but also both bed decks and ordering some parts.   What I got was a couple of pigtails and an extension cable from Battery Tender (just search on Amazon).  It's the same wiring setup as Zamp uses - they use the same connector parts.  Since I use the Battery Tender Jr already wired to the engine battery, I thought this would be a piece of cake.

Here is the pigtail wired to the controller.


I just added the neg to the common ground port, and the pos to Battery 2 port.


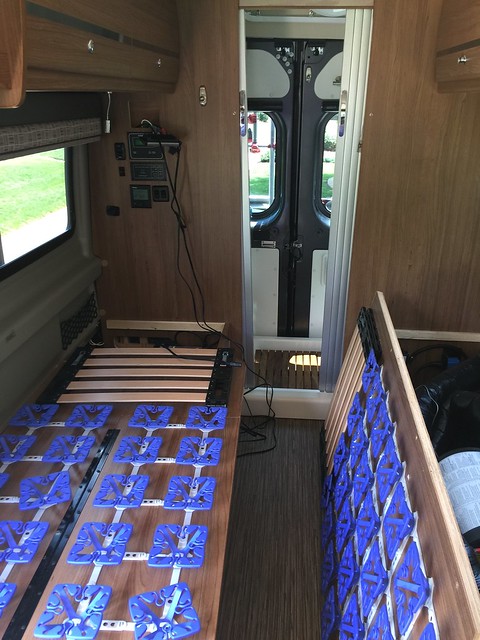
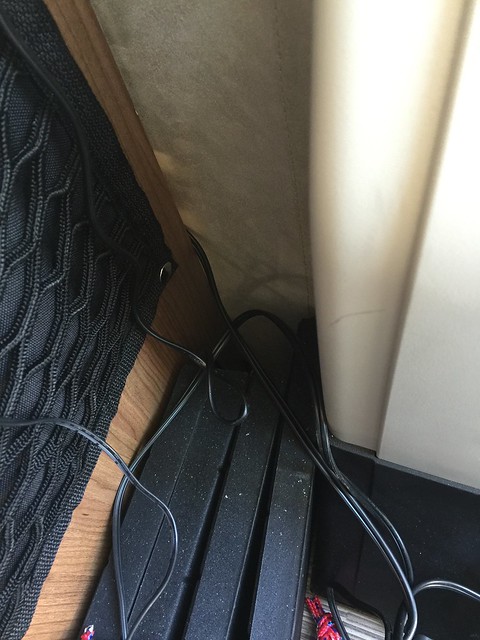
I used a wire coat hanger to fish the cable thru the edge of the shower pan from under one bed to the other.  Then I ran the cable thru the street-side bed and behind the kitchen cabinet.   Thankfully I had a screw gun - I don't recommend trying to do all these screws by hand.

It came out behind the driver's seat and met up perfectly with the pigtail I had for the Battery Tender Jr attached to the engine battery under the driver's footwell.


I thought I was quite clever!  Plugged it in, heard a pop and nothing on the controller's display.  Still the error code of no Battery 2.   Checked the in-line fuse on the pigtail.  It was burned up.  Put in another and pop! Same thing happened.  Replaced it again and the same result!  Was the wire bad?  Were my connections at the controller wrong?   I've been charging with the Battery Tender for months, so the wiring on the engine battery must be good.   So in checking the cabling, it struck me - by using these specific cables, the pos and neg get reversed when you have pigtails at both ends.   So to fix, I got another pigtail and just reversed the polarity at the battery.  So now I have one pigtail for the Battery Tender Jr, and another marked solar for connecting to my new lithium controller (Battery 2 is now set to AGM).

Buttoned back up again, everything is working perfectly and no error messages.  I have 90% of my solar going to the house batteries, and 10% going to the engine battery.  Unless of course either is fully charged and all energy goes to the remaining battery.

Sunday, May 1, 2016

A Little Van Organizing

Rosie McSweeney inspired me to go thru the drawers in my van and improve my organization.

Of course that meant a shopping trip!   Lowes of course, and Target.

I went intending only to pick up some drawer organizers, but a few other things ended up in my cart.

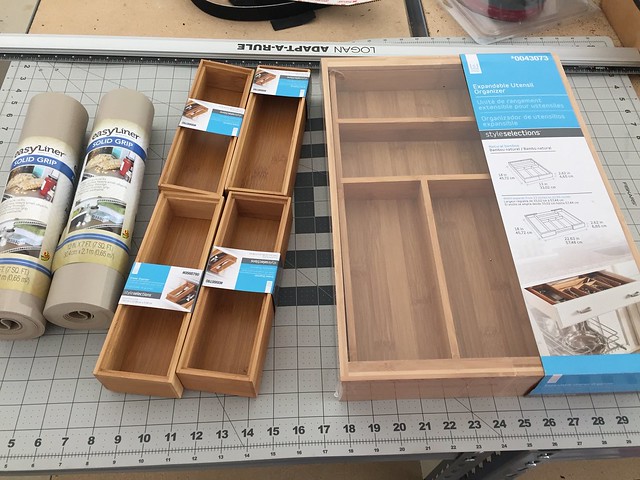
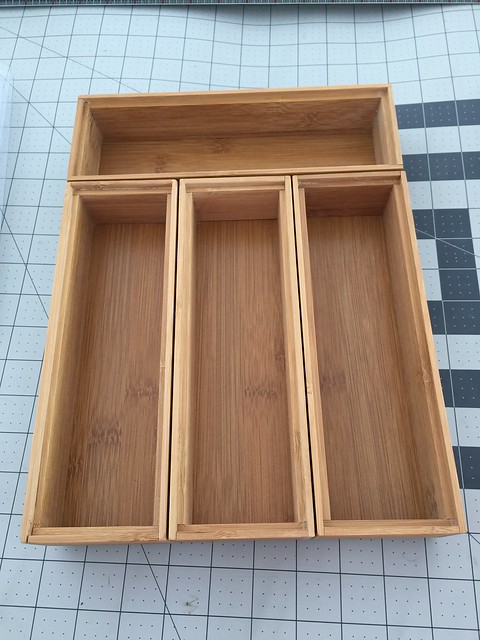
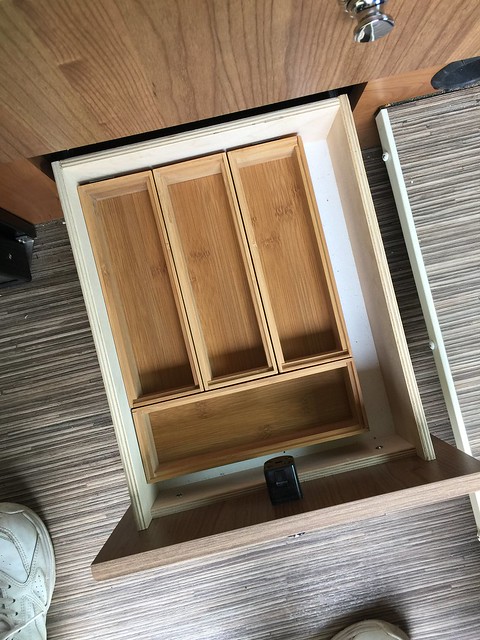
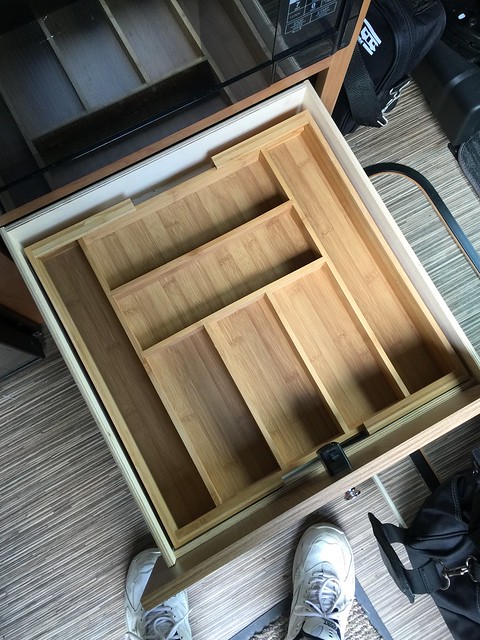
I wanted to get a bamboo cutlery organizer for the smaller drawer (10.25" x 13") and something big to organize the larger drawer (18.5" x 18.5") in my K.  The cutlery ones were all too long (14") for the smaller drawer, but I did find these smaller bins, so I thought I'd craft my own.  The larger one is for the big drawer - it was the right length depth-wise, and is expandable in the other direction, so it should be an excellent fit.


Next to this stuff, was shelf liner.  They had this nice material that was a soft vinyl on one side, a non-slip on the other.  7' x 12" rolls.  That should keep stuff in the lockers from jumping around.  The lockers on the street side are alittle narrower - around 11.25" deep, so you need to trim.  Oddly, on the curbside, 12" fits perfectly, so no need to trim.

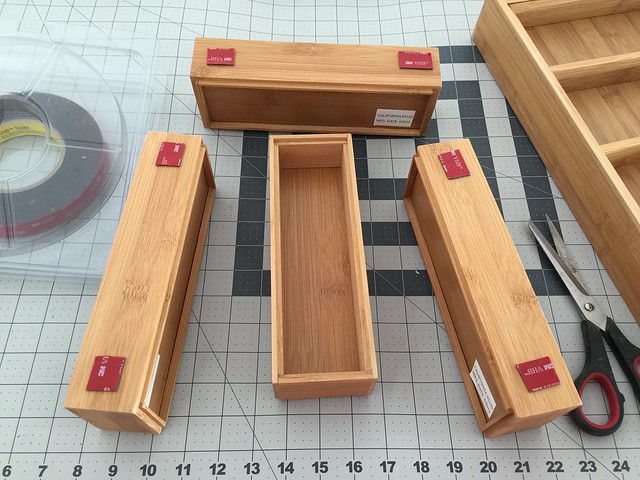
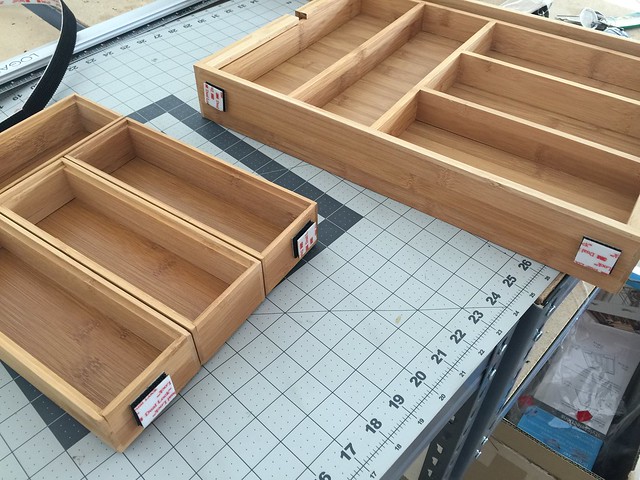
To assemble the cutlery tray, I put some VHB tape on the pieces to hold them together.


Here it is together.  Doing it this way was only $2 more expensive than buying a pre-made, but this will fit the drawer nicely.


I then put some "exteme" velcro on the sides to hold them in place in the drawers.


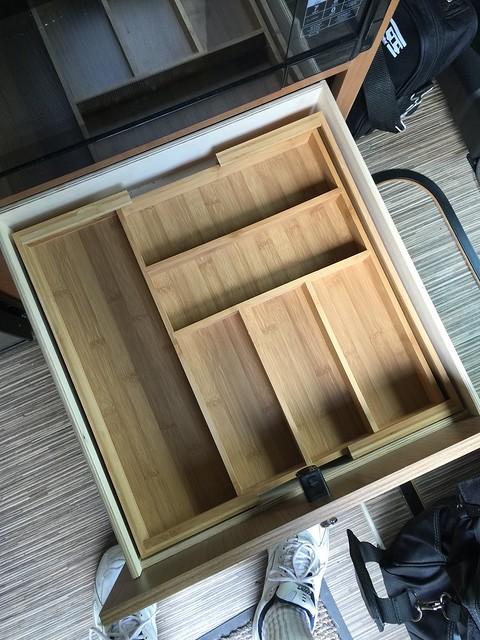
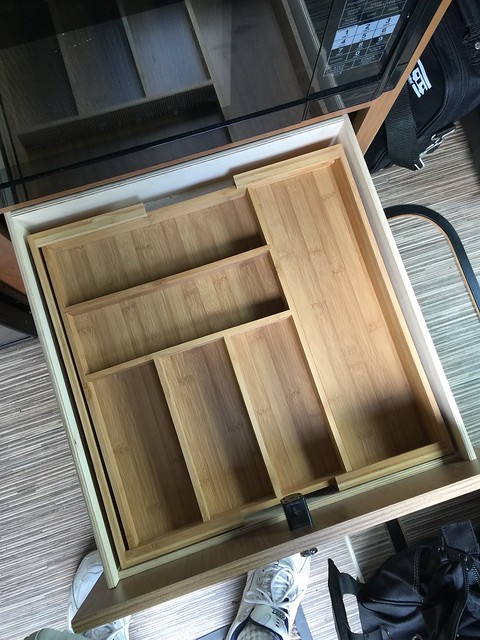
So here is the large organizer in place.  By putting the velcro on the outer edges, it allows you to move the center section however you'd like to create compartments on the sides.  

On center:


To the right:


To the left:


Here is the cutlery tray in the lower drawer:


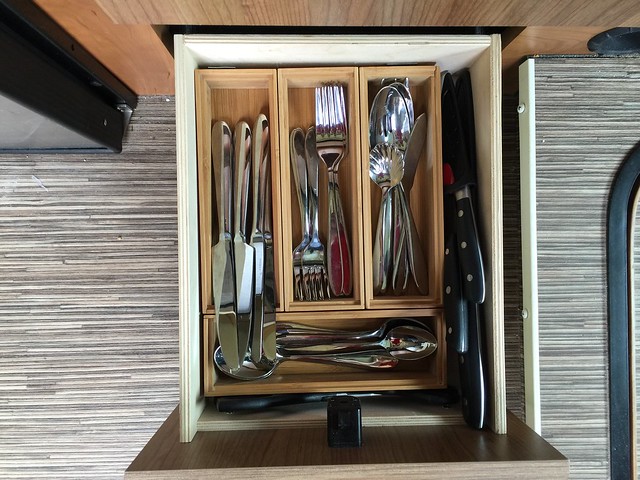
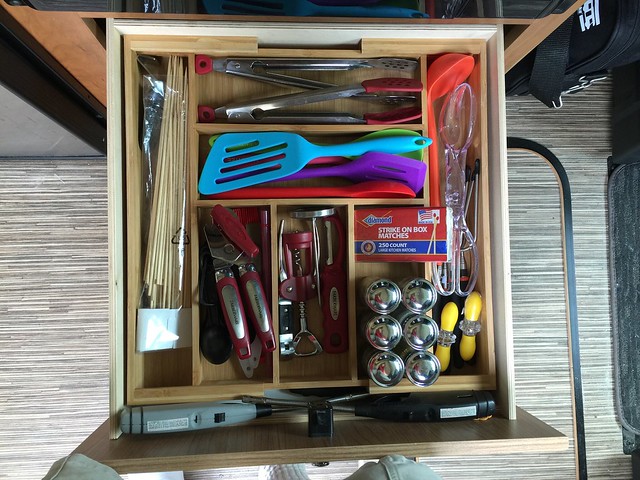
Now with all my junk in place.  I culled this alittle, but I still have way too much stuff.


The cutlery drawer.  My butter knives are too long. :(


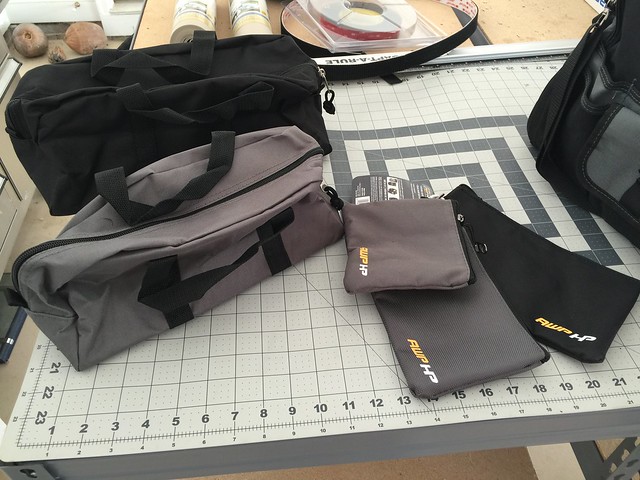
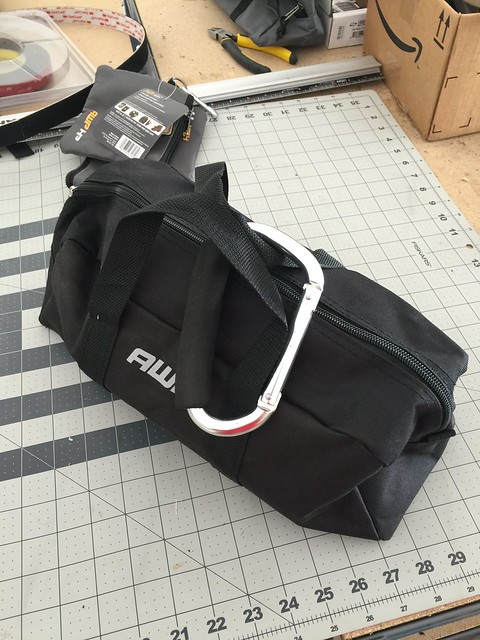
Another thing I wanted to do was condense my tool bag.  It had alot of empty space inside, and was too big to fit in a cubby or locker.  It was riding around on the floor, which I detest.   So I found these neat canvas toolbags at Lowes.  The bigger bags came in a two-pack for $10.  The smaller, zipper "purses" came in a 3 pack for $10.   So I'm going to put my van tool kit in the black bag, and put sundries like spare fuses, extra screws and clips, some zip ties and spare led bulbs in the larger black purse.


So here it is all put together along with the big carabiner I use for the dog tether.


Fits nicely in the rear cubby now, but it will also fit in one of the overhead lockers.


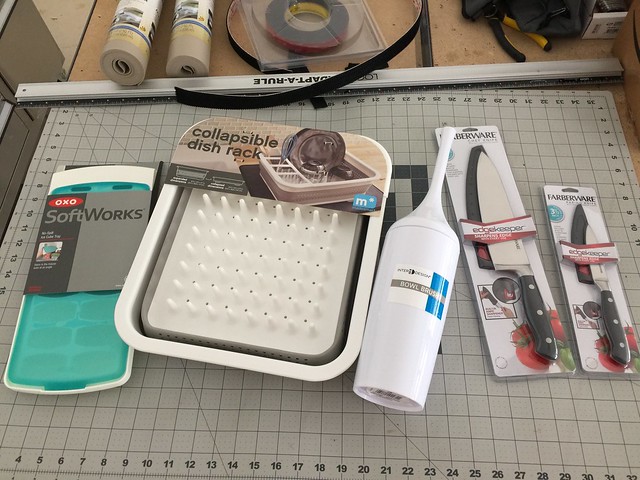
Here are some other items I impulsed while shopping for the organizers.   At Target I found this cool ice tray, the toilet brush and these neat sheathed knives.  At Lowes I found the collapsible dish rack.  I like the toilet brush because it has a smooth curved finish that will be easy cleanup.   My last one had a metallic top which was starting to corrode already.   I stick it down next to the commode with "extreme" velcro.


I wanted to reduce the number of knives I was carrying.   I found these Faberware forged knives at Target with their own sheaths that have built-in ceramic sharpening blocks.  They seem heavy and well made from an otherwise awful brand, so I'm taking a chance on these.  Luckily they were pretty cheap ($15 and $9).  One is a general purpose knife, the other a paring knife.   For now, I'm keeping a Chicago Cutlery serrated knife of a length between these two.  So three knives for the van.  That's down from 12!

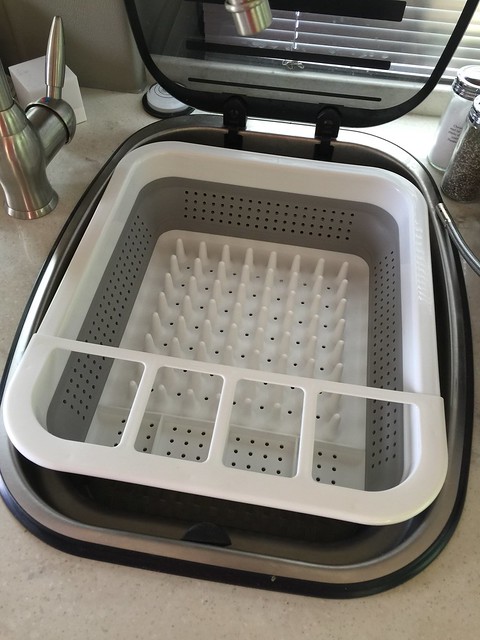
This is the first collapsible dish rack that I've found that is a manageable size for the van (at Lowes).  The others I've seen are huge in comparison and inappropriate for the space.   They also sell a plastic tray to use to collect the dripping water.

But as luck would have it, it fits perfectly in the K's sink!  Bonus!   You can set up the collapsible tub on the counter as a wash basin, and rinse and let your dishes drip in the sink.  Saves alot of counter space and jockeying things around doing the dishes.


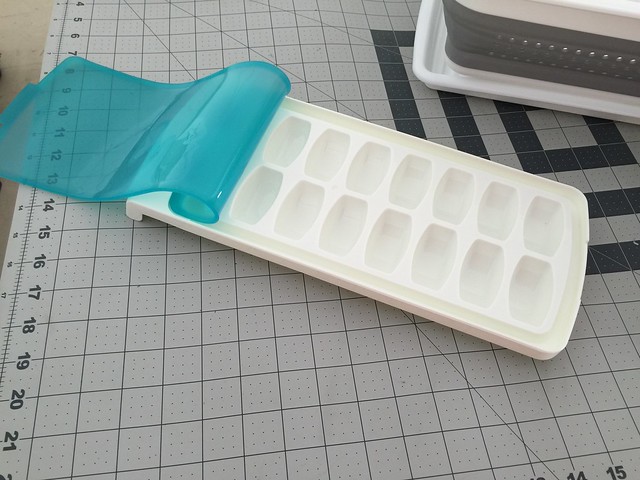
I got this ice tray at Target.  What I like was that it was labeled as "dripless".  I guess for people that spill on the way to the freezer.


But the dimensions are what piqued my interest.  It's wide and long, but not very tall.  With the lid on, you could stack items on top and maximize the freezer space in the K.


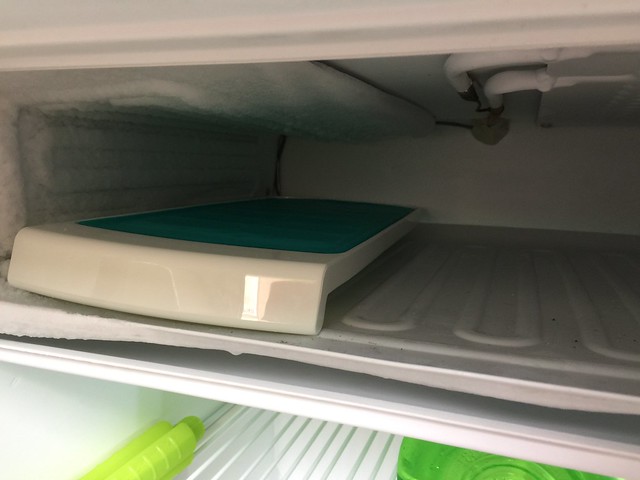
With the depth of the freezer, this fits perfectly.  Wasn't sure it would, but again, another happy surprise!  Yes, I need to defrost.


The last thing I got at Lowes were these acrylic bins.  They are made to put in your freezer, but I thought they'd work to keep my dry goods organized in the overhead lockers.  Also, if you group like items, you can pull them out and set them on the counter.  I'll have to think about what will go in each.   They fit very well in the overhead and still leave a couple inches to place items you want to grab and go.  Plus I like that you can see thru them which may be handy, as in the upper lockers, they will be right at eye level.